
Cron jobs run simple commands, shell scripts, and programs written in languages such as PHP, Python, Node.js, and Perl. Basically, any task that can be done in the command line can be automated and run on a set schedule.
Typical uses for a cron job include:
- Log management - Delete old logs to prevent them from becoming unmanageable.
- Sending emails - Send notifications to users when they approach their resource limits.
- Updating software - Automatically check software for updates and apply them.
- Backups - Schedule backups for website files and databases
How to set up a Cron Job in cPanel
Accessing your server using the Terminal feature is as simple as logging into your cPanel account and clicking a couple of links.
The first step is to log in to your cPanel admin area. Your web host will send you details on how to do this in your welcome email.
We’ve covered the different methods of logging in to cPanel here.

Under the Advanced Panel, click the Cron Jobs icon to bring up the configuration screen.
To change the email address where output notifications are sent, add the new email address to the Email input box in the Cron Email section.
Once you have entered the new email address, click the Update Email button.
If you do not update the email address, notifications will be sent to the cPanel’s default email address.
If you do not want any Cron Job notification emails to be sent, you should add the following to the end of the cron job command:
>/dev/null 2>&1To add a new cron job, scroll down to the “Add a New Cron Job” section and complete the configuration form. The form sets out the frequency in which the cronjob is carried out and the cron job command.
Let’s review these settings in detail:
Common Settings - This contains common time intervals in which the cron job is to be carried out. These include “Once per minute”, “Once per 5 minutes”, “Once per 15 minutes”, as well as specific times within the hour such as “0” or “6”.
Selecting a Common Setting will fill the rest of the form’s time settings.
Minute - Here, you enter the minute settings for the cron job. You can specify an interval with a star, followed by a slash, and then the interval in minutes. For example,
*/2is a two-minute interval. Alternatively, you can specify a specific minute, such as6, to run the cron job on the 6th minute of the hour.You will see a dropdown to the right of the Minute box with some common settings.
You can configure the following settings in a similar way to the minute setting:
- Hour - This setting allows you to set specific hours of the day or an hourly interval.
- Day - This setting enables you to set specific days of the month or a daily interval.
- Month - This setting allows you to set specific months of the year or a monthly interval.
- Weekday - This setting allows you to select specific days of the week (
0is a Sunday through to6, which is a Saturday), such as every weekday, every weekend, specific weekdays, etc.
Note: It is advisable not to run a cron job too frequently because:
- If you run a cron job every minute, the server may not finish executing the cron command before it starts again.
- It can use up considerable server resources. A minimum frequency of every 5 or 15 minutes is recommended. Many shared hosting providers require a 15-minute interval as the minimum (check their terms and conditions).
The following setting relates to the command to be run for the cron job:
Command - This setting is where you specify your cron job command.
The following example executes a
PHPcommand:/usr/local/bin/php /home/thewebmaster/public_html/path/to/cron/scriptIf you have addon domains, you will need to factor in the domain path, as well as the PHP version:
/usr/local/bin/ea-php73 /home/thewebmaster/domain_path/path/to/cron/scriptIn the above example, you should replace “ea-php99” with the PHP version assigned to your domain. This information can be found in the MultiPHP Manager under the PHP Version column.
Once you have configured all the settings, click “Add New Cron Job”.
How to Edit an Existing Cron Job
Under the Advanced Panel, click the Cron Jobs icon to bring up the configuration screen.
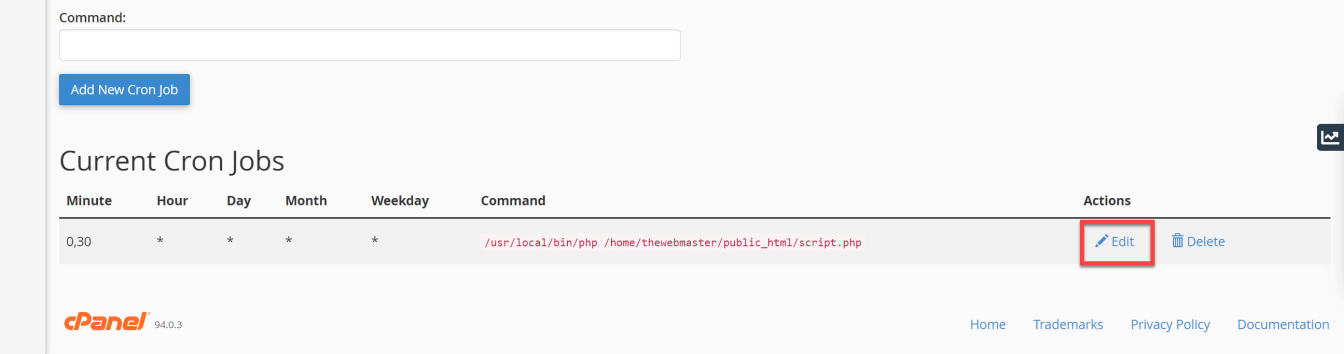
- Scroll down the screen until you reach the “Current Cron Jobs” section.
- Click the “Edit” link next to the cron job you wish to edit.
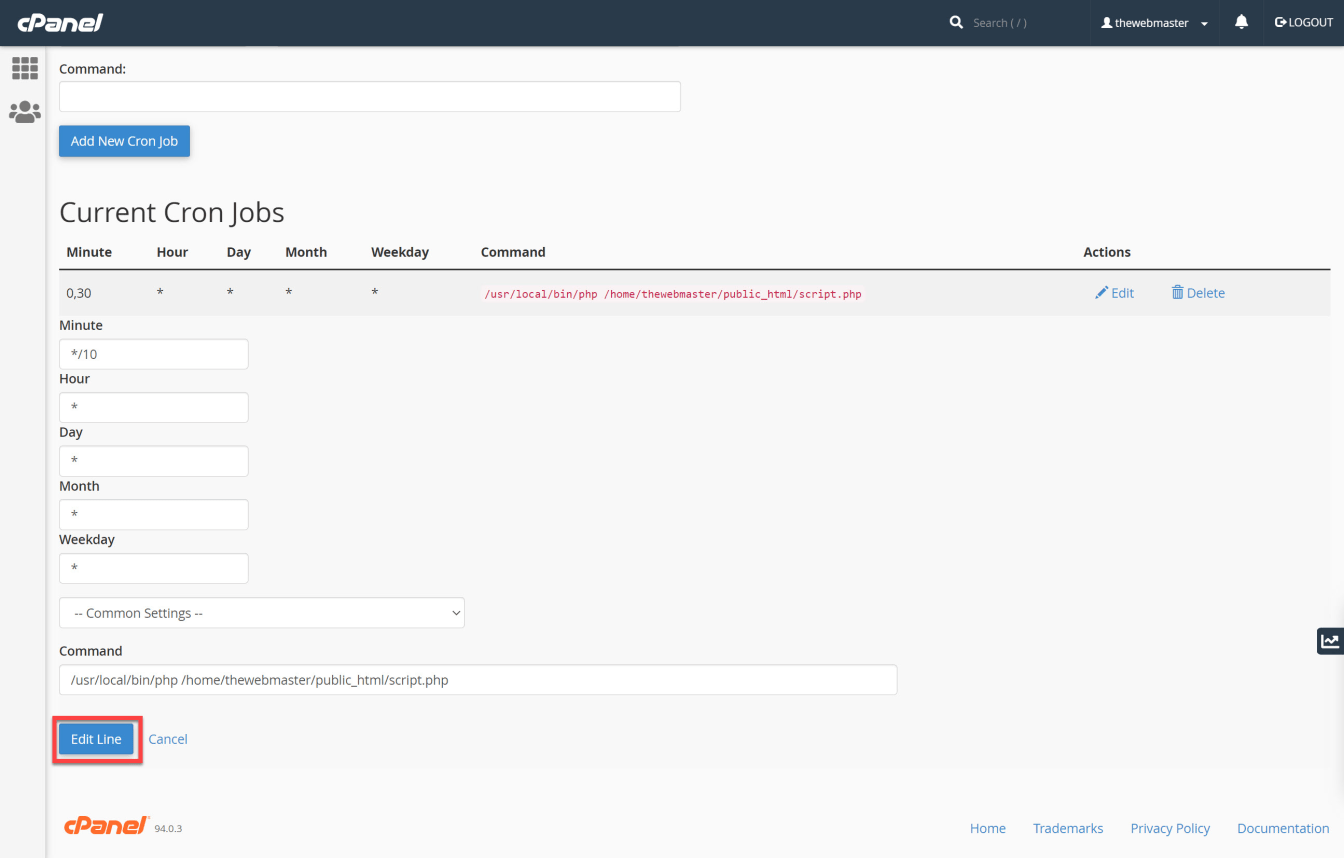
Here you can make any changes to your cron job by altering any settings made when creating it.
Note: Only the main “Common Settings” dropdown is available. The Common settings dropdown for each of the Minute, Hour, Day, Month, and Weekday boxes are absent. You can always delete this cron and start again or create a dummy cron and copy over the settings if needed.
Once you are happy with your changes, click the “Edit Line” button.
How to Delete an Existing Cron Job
Under the Advanced Panel, click the Cron Jobs icon to bring up the configuration screen.
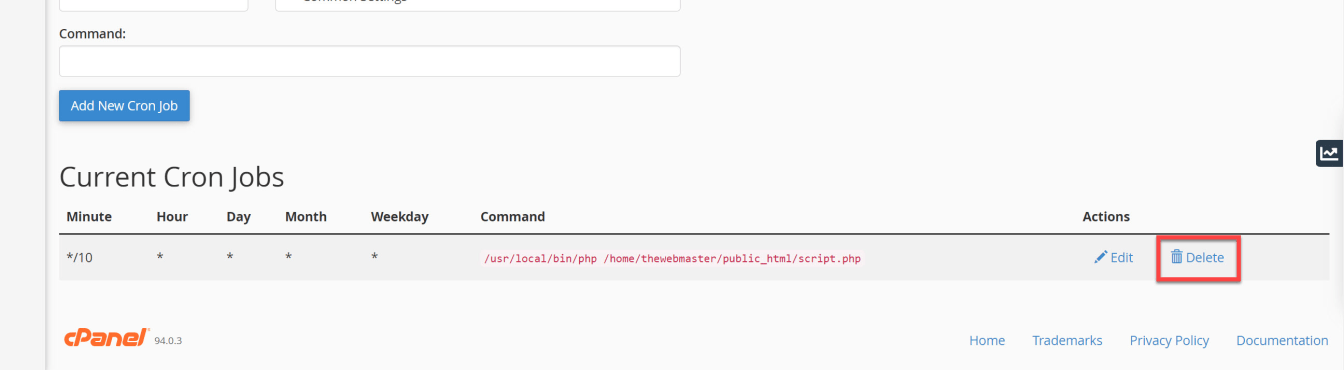
- Scroll down the screen until you reach the “Current Cron Jobs” section.
- Click the “Delete” link next to the cron job you wish to delete.
- Click the “Delete” button to confirm.
Click the “Delete” button to confirm the deletion.

Frequently Asked Questions
How do I know if a cron job is running or not in cPanel?
Checking the Cron Job logs requires root access. If you have root access, you can run the following command (replace “scriptname.php” with the name of your script):
grep "scriptname.php" /var/log/cronIf you have shared hosting, no root access, or do not wish to use the command line, you should specify a cron job email. Because this could quickly flood your inbox, you may want to set up a specific email address for this purpose.