
This article looks at the differences between baseline and progressive JPEGS, how you can optimize progressive jpegs for your website, and more.
JPEG is an abbreviation for the Joint Photographic Experts Group. They created the format back in 1992. JPEG images can use the filename extension of .jpeg or .jpg.
JPEG images work best on photographs or realistic images with a smooth tone and color variation. Because the compression of these images is very efficient, its usage on the web is prevalent.
As of the 3rd March 2022, JPEGs are used on 74.3 percent of all websites.
You can find an in-depth guide on JPEG, as well as how JPEG encoding works here.
What is a Progressive JPEG Image?
A progressive JPEG is an interlaced image that first renders line by line, from top to bottom. It loads in low quality and then progressively renders with successive “passes” until the image displays in full resolution.
A typical progressive JPEG loads within 3 passes. However, depending on the software and settings used, it can be up to 5 or more.
Progressive JPEGs are great for users on slow connections because they instantly see a lower-quality image rather than watching a blank space waiting to load.
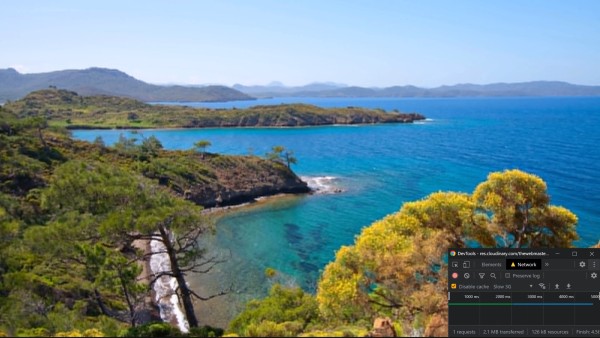
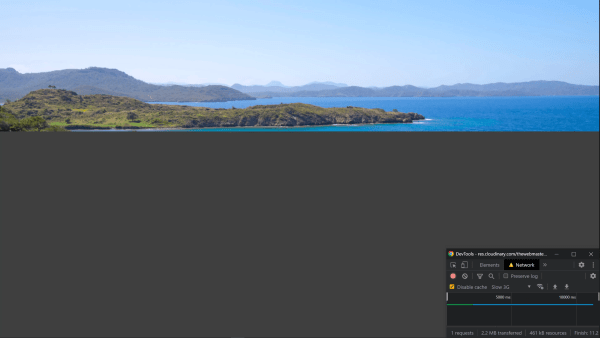
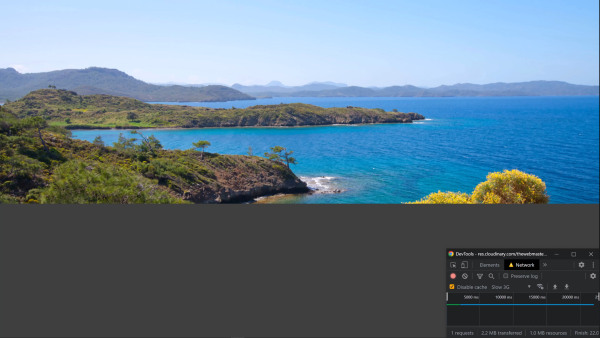
And here is what it looks like on a slow connection with three passes:
The 2.1MB image took 43 seconds to download completely.
You may not have realized how long it took to download without watching the video.
After all, you could make out the image in reasonable detail within a few seconds. By 25 seconds, the resolution was pretty good.
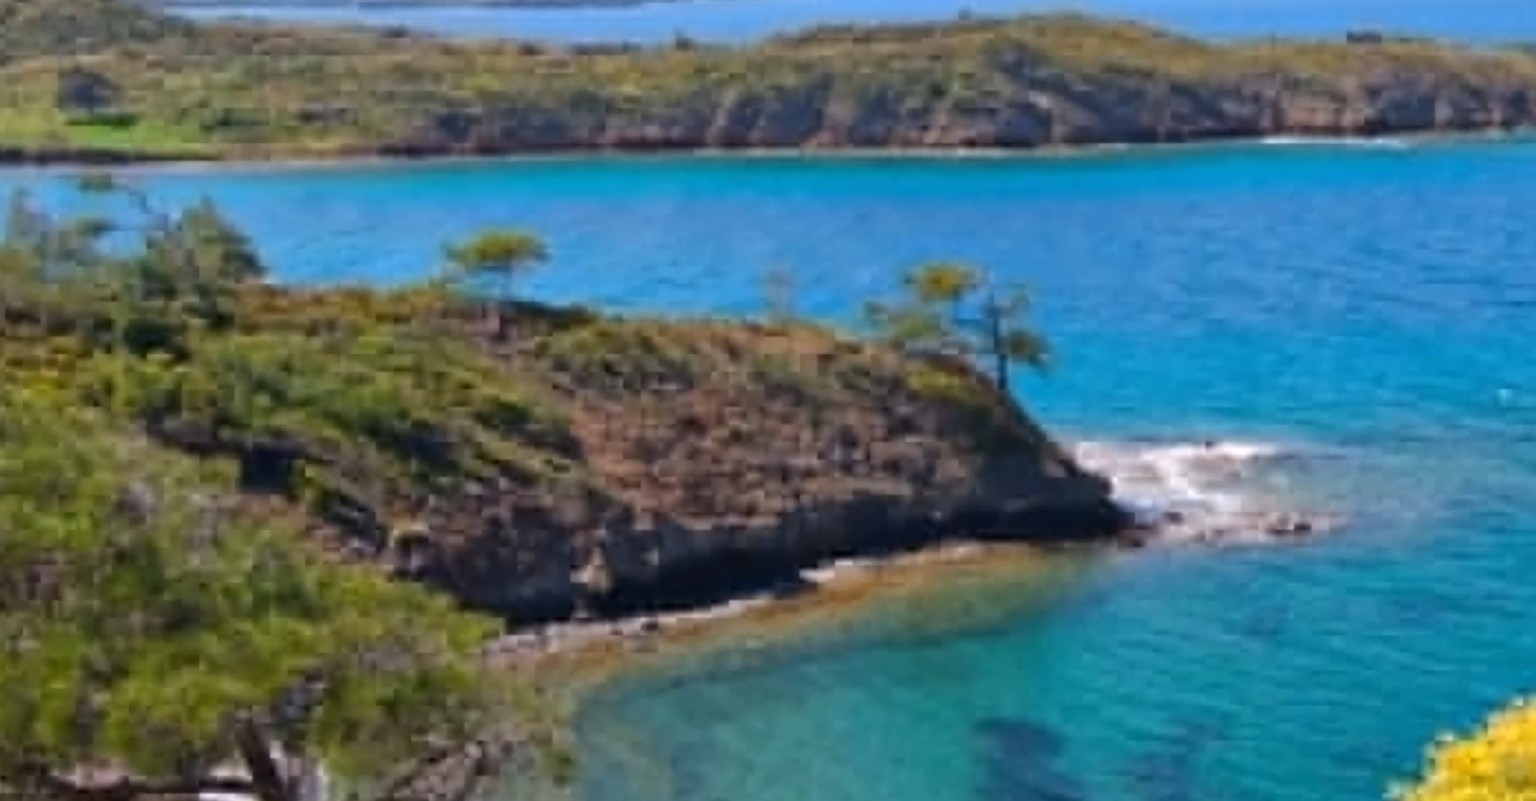
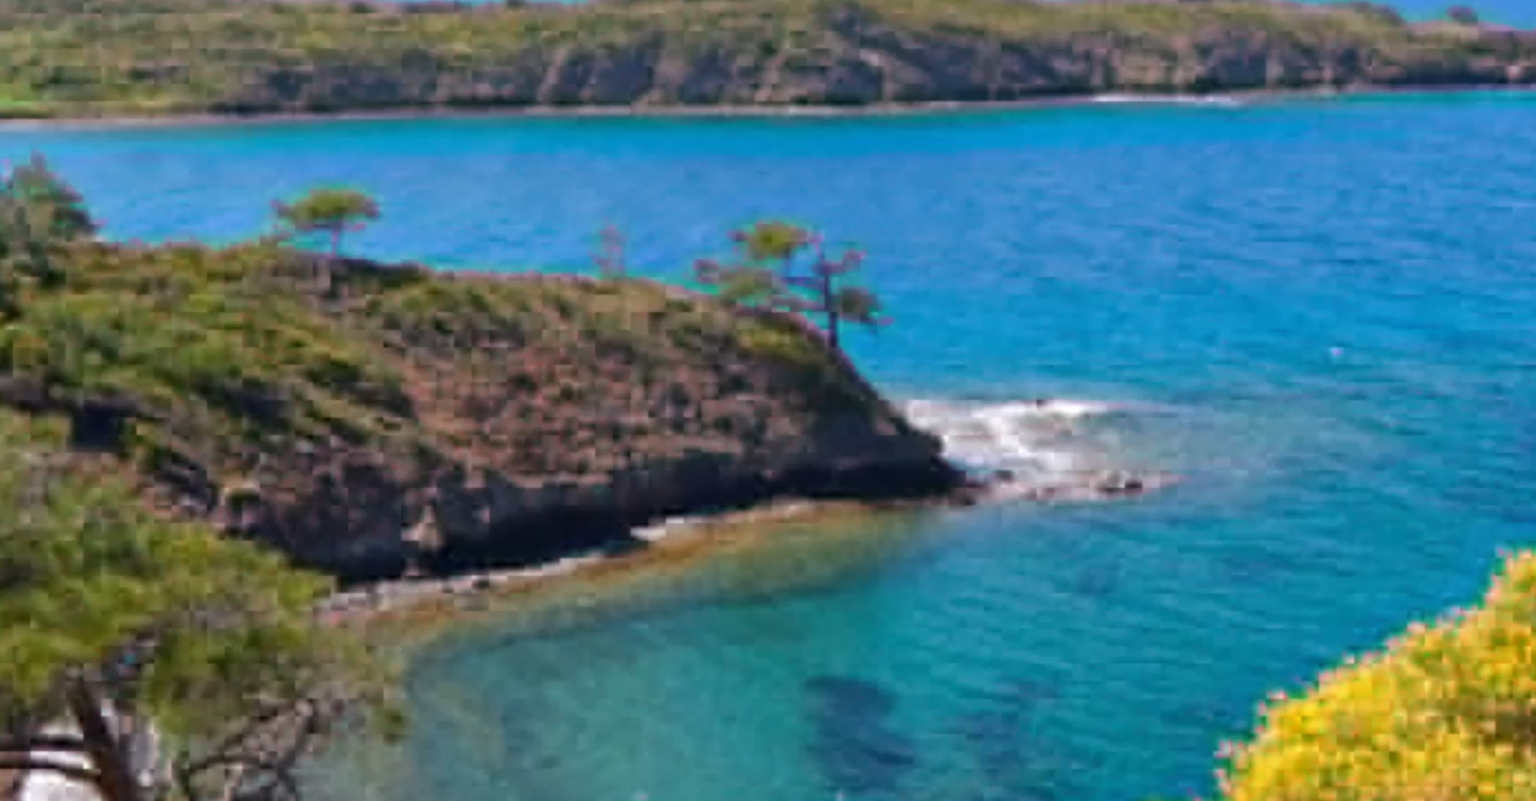
Let’s zoom in on the image around the 3-second mark (high resolution):
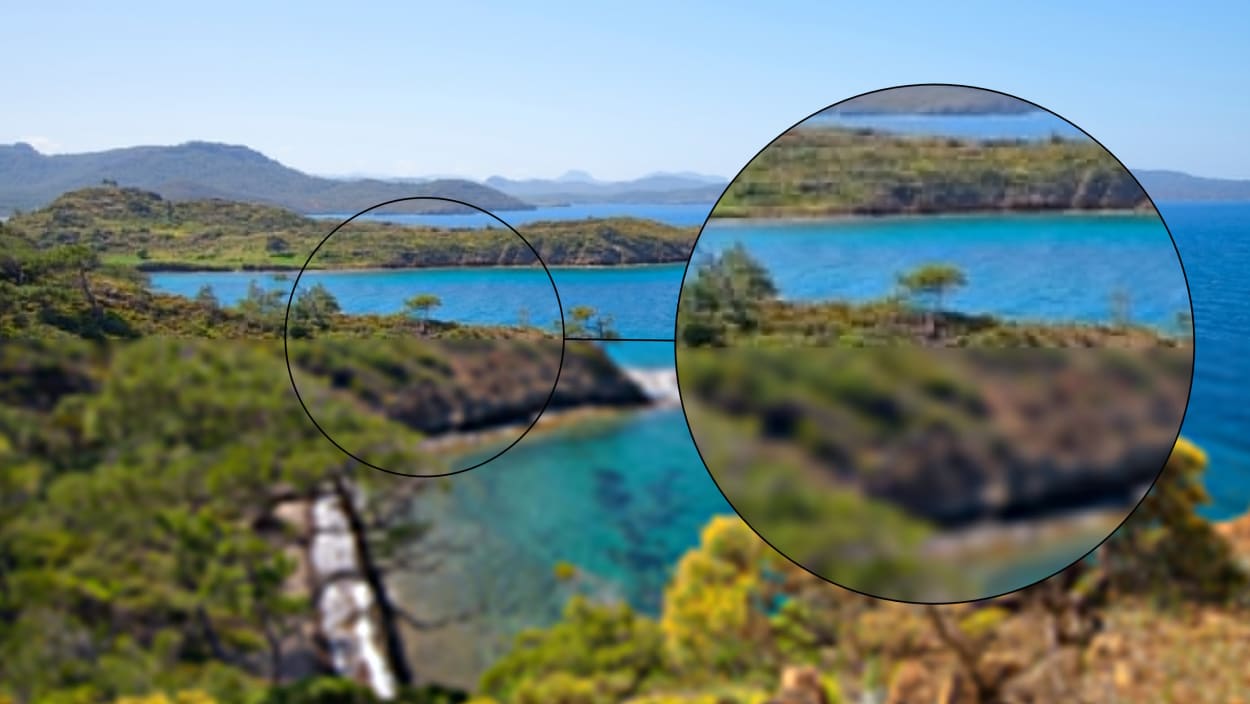
You can clearly see the difference in resolution as the image is loaded.
Next, we’ll look at this in more detail by comparing progressive JPEGs with baseline JPEGs.
What is the difference between a baseline and progressive JPEG?
A baseline JPEG loads the image from top to bottom, line by line, until the image is complete. On the other hand, a progressive JPEG loads line by line, from top to bottom, in low quality and then progressively renders with successive “passes” until the image displays in full resolution.
Let’s compare the two together with examples.
But, I am not going to show you some artificially produced comparisons (like you see on other sites).
You know, the ones where the progressive jpeg is still shown blurred after loading 30% of the image:
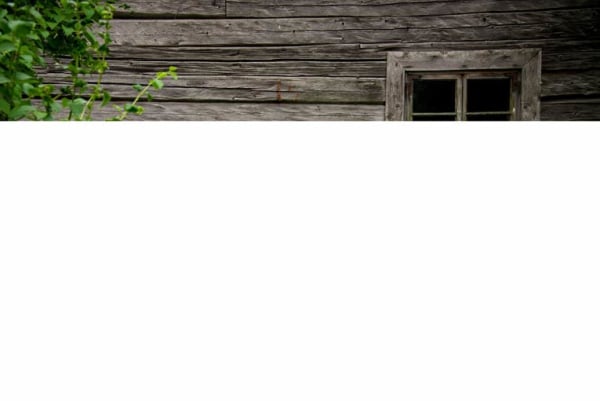
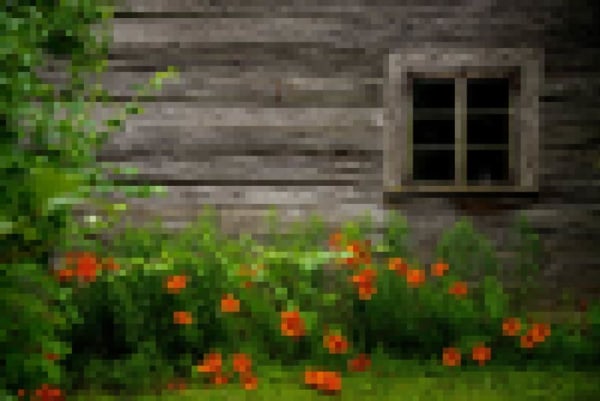
I’m going to show you an accurate comparison right now.
Baseline vs. Progressive Example
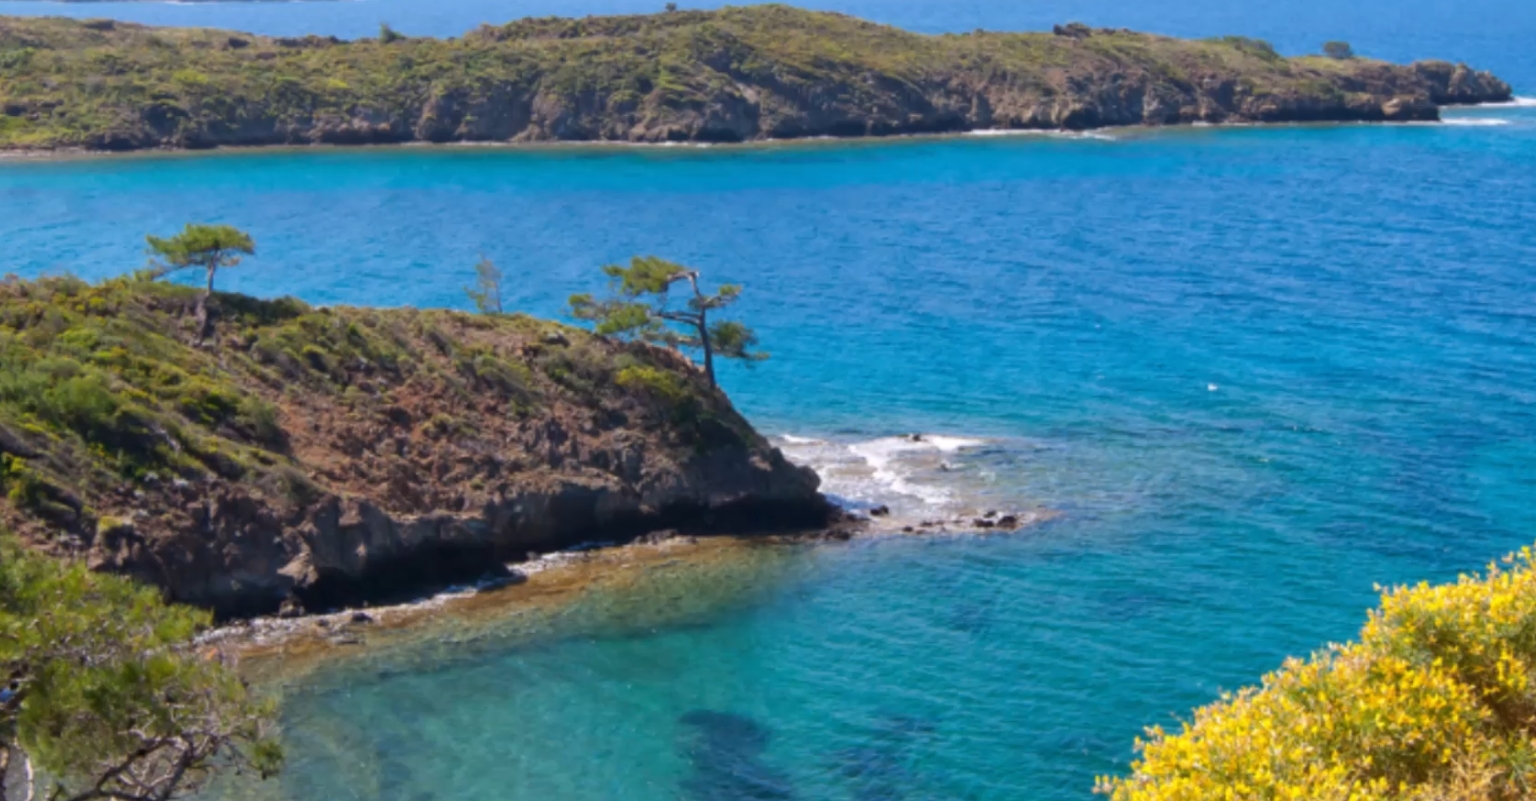
Let’s use our previous coastal image example. We know it takes around 40 seconds to load on a slow 3G setting.
Next, we’ll look at progress at the following intervals:
- 10% (4.5 seconds)
- 25% (11 seconds)
- 50% (22 seconds)
- 75% (33 seconds)
I’ll include a small image of both the baseline and progressive JPEGs. As these are scaled down, some of the artifacts in the image become less visible. As such, I have included a link to the high-resolution images and an extract of the progressive JPEG at the same resolution as the original.
Baseline vs. Progressive - 10% loaded

An extract of the progressive image at the original resolution:
High resolution images: Baseline | Progressive
By the 4-second mark, the progressive JPEG has already completed its first scan and is on the second. The resolution is reasonable, though it does appear quite blocky.
It is undoubtedly impressive and better than the baseline JPEG at this stage.
Baseline vs. Progressive - 25% loaded

An extract of the progressive image at the original resolution:
High resolution images: Baseline | Progressive
Baseline vs. Progressive - 50% loaded

An extract of the progressive image at the original resolution:

High resolution images: Baseline | Progressive
The progressive image is in the middle of its second scan at the halfway mark. Open up the high-resolution image to see the difference in blockiness between the top and bottom of the image.
The baseline JPEG has loaded just over 50% of the image at the halfway mark. This is because there are many high-frequency changes in the sky.
As such, this was compressed much better (think run-length encoding). It downloads the first part of the image faster than the rest.
Baseline vs. Progressive - 75% loaded


An extract of the progressive image at the original resolution:
High resolution images: Baseline | Progressive
Despite only being 75% loaded, the progressive JPEG appears, at least to a typical web user, complete.
I’ll talk about the best scenarios to use progressive JPEGs a little later.
Should You Save a JPEG as baseline or progressive?
We’ve already looked at the differences between how baseline and progressive JPEGs load.
Now let’s try to come to a conclusion about which is better.
Progressive JPEGs Improve User Experience
Progressive JPEGs were all the rage back in the late 1990s when the internet relied on slow dial-up connections until the GIF format rose in popularity. With the increase in mobile devices with slower internet connections or retina devices requiring larger images, images’ time to load has slowed.
Traditional baseline JPEGs leave considerable whitespace on the screen until the image has finished loading. This makes the web pages appear to load slowly.
We’ve already seen some examples showing the difference between progressive and baseline JPEGs. But, it’s helpful to drop it again here:
High resolution images: Baseline | Progressive
As you can see, even after just 10% of the image is loaded, the whole picture is visible, albeit in low quality.
But why does this matter?
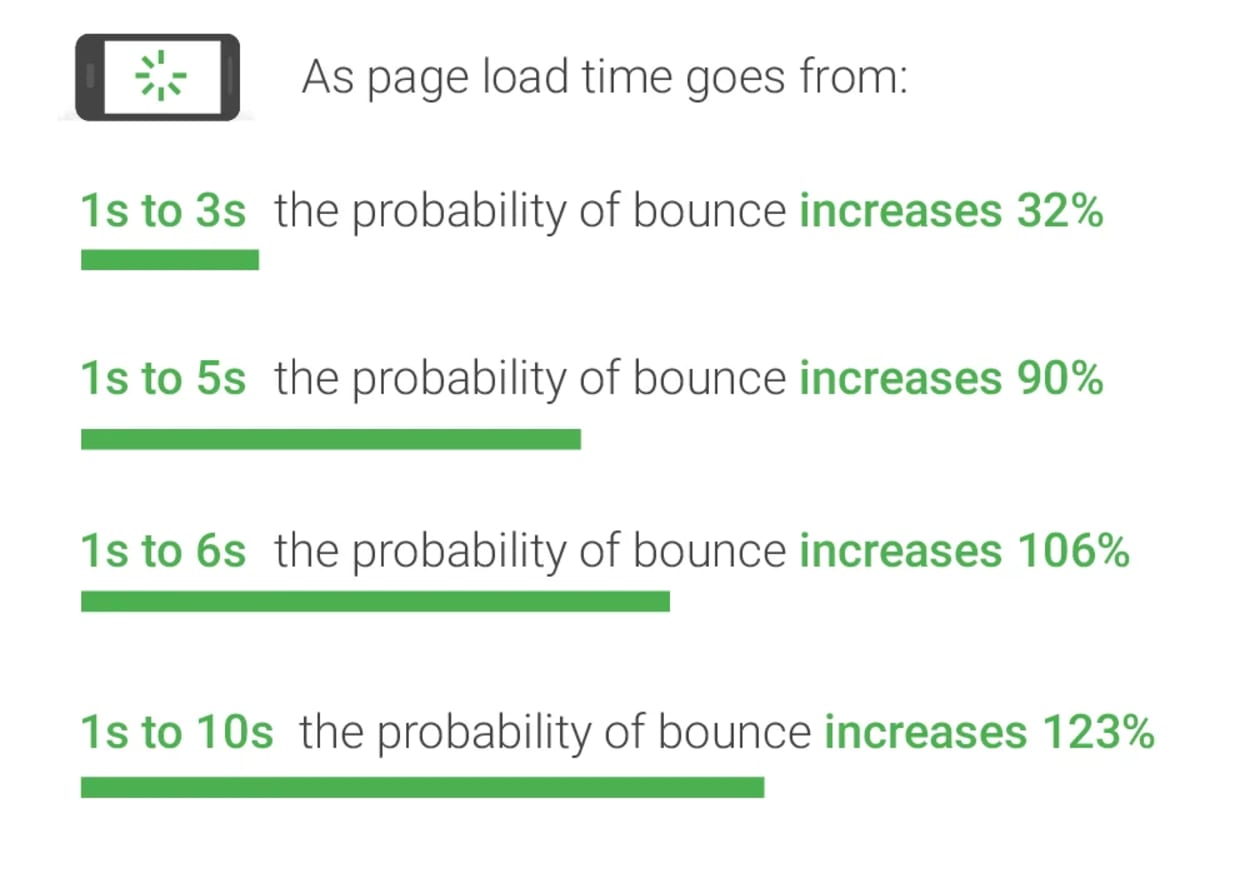
According to Google the probability the visitor gives up (bounces) increases by 123 percent if the load time of mobile web page increases from 1 second to 10 seconds.
The rest of the statistics can be seen below:
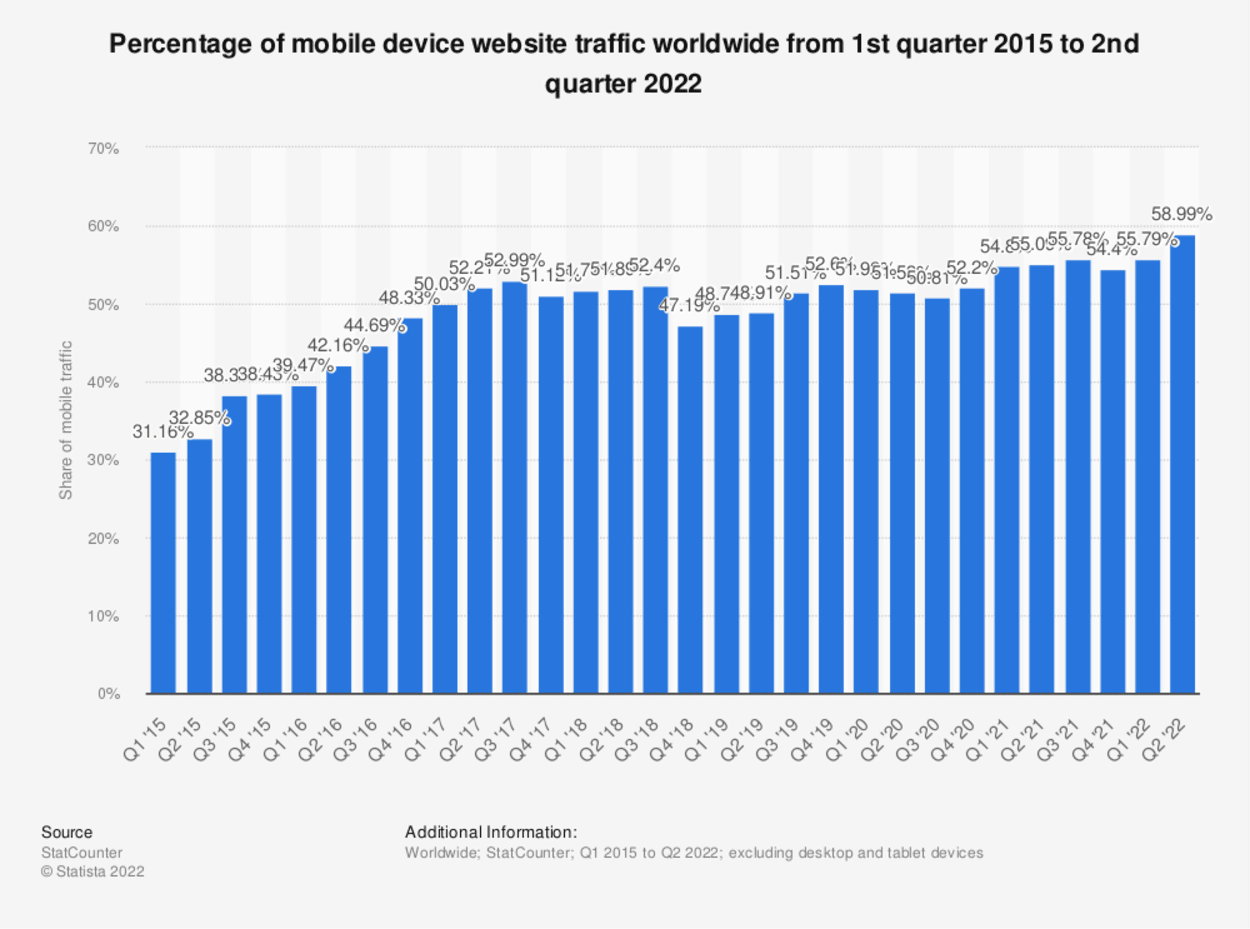
Coupled with the fact that nearly 58% of all web traffic occurs on a mobile:
Progressive JPEGs have a Smaller File Size
You might have mistakenly thought progressive JPEGs are larger than regular baseline JPEGs. After all, the image is loaded in multiple layers (scans).
In fact, progressive JPEGs are mostly smaller, but only by a small amount. More suitable Huffman tables can be used during JPEG encoding during the entropy stage, as each scan contains coefficients at similar frequencies.
This is confirmed by an experiment carried out around 2012 by Stoyan Stefanov. He compared the file sizes of 10,000 random baseline JPEGs before and after conversion to progressive JPEGs and found the following:
- Images 10K in size and over are more likely to be smaller as progressive JPEGs
- The difference was up to 10% (3% median), which translated to over 250K savings in extreme cases.
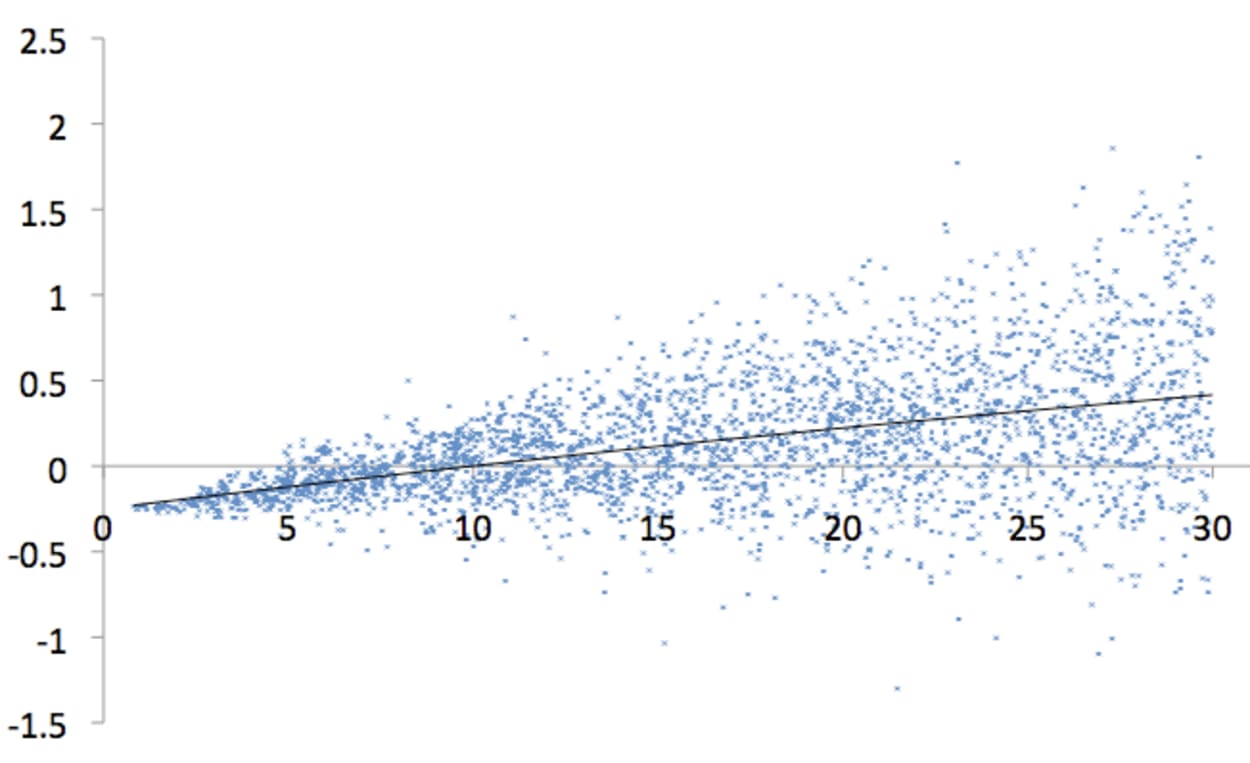
The image shows the difference between progressive and baseline codings. The X-axis shows the original image file size, and the Y shows the difference when subtracting progressive from baseline sizes.
Progressive JPEGs use more CPU during decoding
The downside of using Progressive JPEGs is that they use more CPU when being decoded into your web browser. But does this make a big enough difference to matter?
As a rule of thumb, progressive JPEG decoding costs roughly three times more resources (CPU, Memory) than its baseline counterpart.
While this may have been an issue in the past, modern desktop computers and smartphones should not be overly taxed by a progressive JPEG.
To prove the point, I ran an experiment with a 2.1MB JPEG image with both Progressive and Baseline encoding. Both were set to a slow 3G network speed, and the tests were made with and without x6 CPU throttling.
| Normal CPU | 6 x CPU Throttling | % Time Increase | |
|---|---|---|---|
| Progressive JPEG | 43.94s | 46.03s | 4.76% |
| Baseline JPEG | 45.43s | 45.47s | 0.09% |
As expected, when throttled, there is a much more significant increase in the time to render the progressive JPEG.
However, I would expect any difference to be negligible with optimized images (i.e., not 2MB), normal network speed, and no throttling with modern smartphones.
Progressive JPEGs may soon help your SEO
Core Web Vitals is a distinct part of the Google Page Experience Update. This can influence your Google Search Engine Rankings.
Core Web Vitals are split into three parts:
- Largest Contentful Paint (LCP): measures loading performance.
- First Input Delay (FID): measures interactivity.
- Cumulative Layout Shift (CLS): measures visual stability.
The part that concerns progressive JPEGs is Largest Contentful Paint. LCP is an important metric for measuring perceived load speed, as it marks when the page’s main content has loaded. This helps to reassure any visitor to the page that it is useful.
Google states that the LCP should occur within 2.5 seconds of when the page first starts loading.

While not confirmed by Google, there are growing discussions (here and here) that indicate that progressive images should be taken into account when measuring the LCP.
The prevailing argument is that the LCP should be calculated not when the image has completed loading but when it is considered “Good Enough”. Much of the discussion centers around how this metric would be assessed. Based on current proposals, however, this could be anywhere between 15% to 50%.
The current discussions are currently waiting for benchmark tests to answer the following blocker question “do we have evidence that progressive image loading creates a better experience?”
We’ll monitor the discussions and provide updates when further information is available. Unfortunately, the discussions have been relatively quiet since September 2021.
How does Progressive JPEG Encoding work?
We’ve already gone through the various steps involved in JPEG compression in our guide to JPEG compression.
To refresh your memory, these are shown in the following diagram:

If you have not already done so, I highly recommend reading our article on [JPEG compression]/tmdhosting-deals/. It will give you a detailed understanding of all the stages shown in this diagram.
However, let’s quickly refresh ourselves on a few pertinent details:
- All images are divided into 8x8 pixel blocks, each processed separately.
- In each 8x8 block, there is a DC coefficient (top left pixel in the matrix), with the remaining being AC coefficients.
- In the entropy encoding stage, the Quantized Coefficients are processed in zigzag order, which helps group similar frequency pixels.
With baseline sequential JPEGs, the entire block 8x8 pixel block is processed in a zigzag order as follows:

With progressive JPEGs, this is not the case.
Progressive encoding encodes a few similar-positioned batches of coefficients of all the 8x8 blocks contained in the image in one go. This is called a scan.
This involves encoding the DC coefficient for all blocks, followed by a few AC coefficients (typically around 4), and then all the remaining AC coefficients.
This typically involves around three scans, depending on the software and settings.
This is how it looks on the diagram:

So, are Progressive JPEGs better?
If the choice is just a simple question between regular baseline or progressive JPEG, then yes, using a progressive JPEG is better.
If the choice is between progressive JPEG and another format such as Webp, AVIF, or SVG, then that depends.
Fortunately, we answer this question in detail later in the article.
How to Check if a JPEG is Progressive
A JPEG image comprises a sequence of segments, each beginning with a marker. Each marker starts with a 0xFF byte followed by a byte that indicates the type of marker it is.
These markers can determine whether the JPEG image is baseline or progressive. For example:
0xFF, 0xC0This marker represents the Start of Frame for a baseline image0xFF, 0xC2This marker represents the Start of Frame for a progressive image
You can search the binary data of an image file to determine whether the JPEG is progressive or baseline.
We have built a simple tool that checks whether a JPEG is progressive. It works by checking for the progressive image marker in the binary data described above.
You can also try out the tool below:
Progressive JPEG Tester
Choose the image file to test below:
Result:
Progressive JPEG Converters
By default, most image-editing tools will save an image in the baseline format.
Many image editing tools can be used to save a picture as progressive, including Photoshop and ImageMagick. If you already have a file you wish to convert, you can load the image into the editor and convert it by resaving it in the desired format.
Photoshop
Our preferred image editor is Photoshop, but Adobe has complicated matters since Photoshop CC 2015 by removing the option to save as a progressive Image when using the “save image as” function. Fortunately, they still have functionality with their legacy “save for web” option in the menu.
You can find this by going to File -> Export -> Save for Web (legacy). When saving, tick the “Progressive” option as shown in the screenshot below:
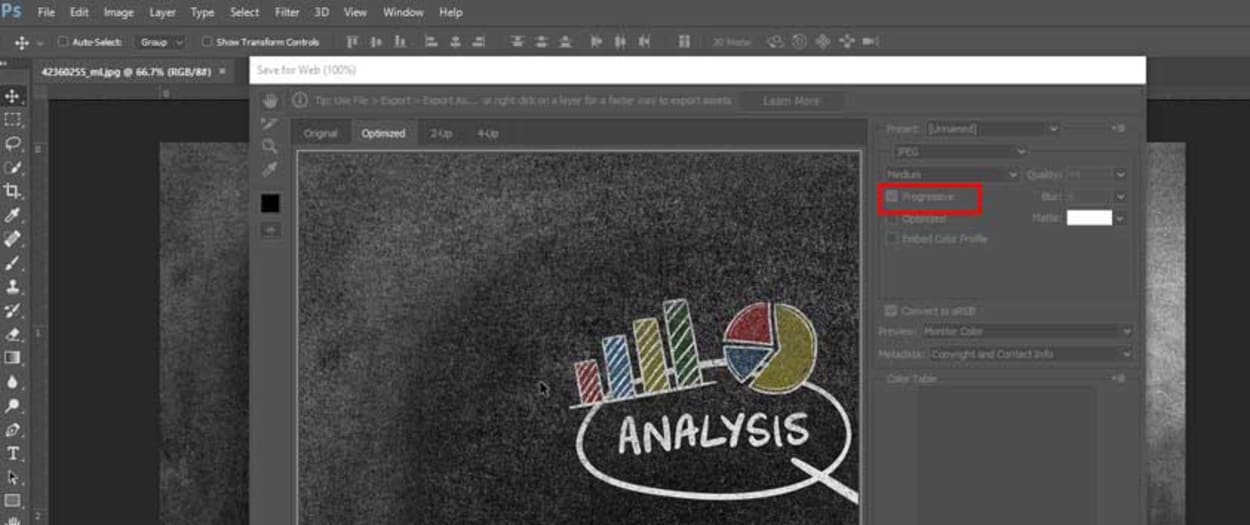
If you have an older version of Photoshop, you can go to File -> Save for Web to get to the relevant interface.
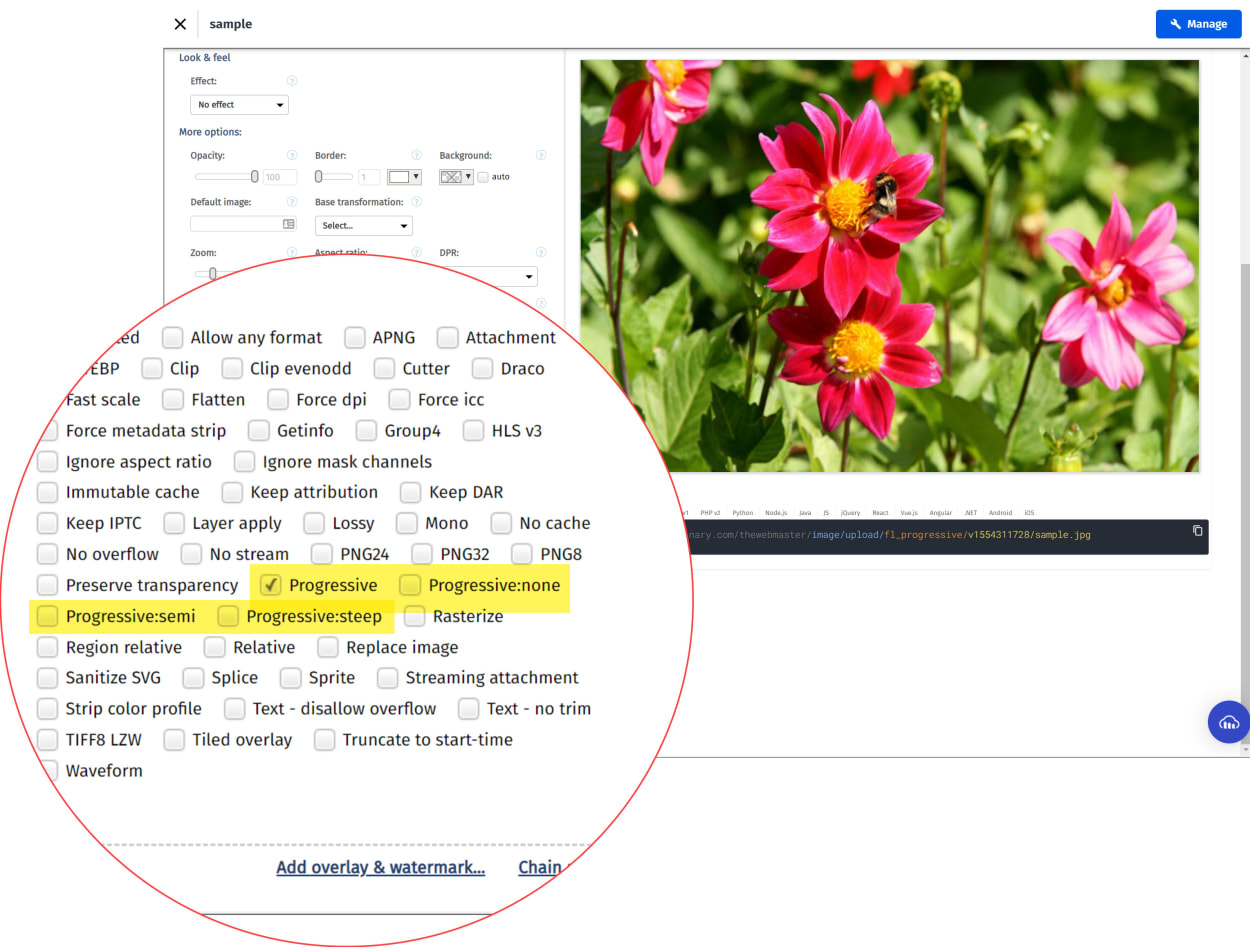
Cloudinary
Cloudinary is an image optimization platform where you can store, create, manipulate, and deliver images. It can be used to optimize images automatically or based on the specific settings you provide.
Cloudinary offers a generous free plan that should be sufficient for most small blogs or business websites, and it is what we currently use on this website.
The advantage with Cloudinary is that you can choose between different types of progressive jpegs, such as No Progressive, Standard Progressive, Semi-progressive, and Steep-progressive.
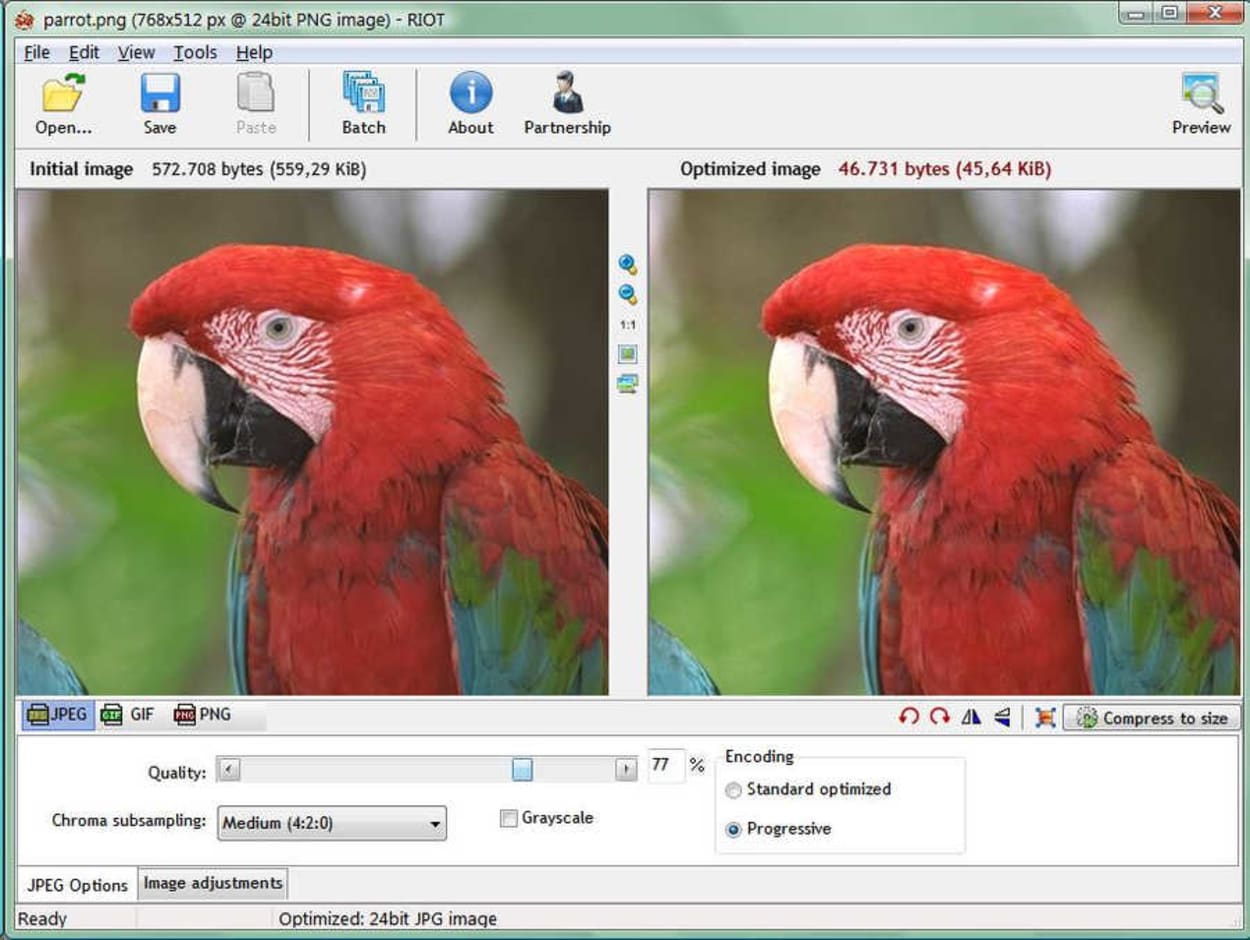
RIOT
One of the best tools for Image Optimization is a small Windows program called RIOT. RIOT stands for Radical Image Optimization Tool. RIOT is a fairly old tool that was created around 2010.
The tool is straightforward to use, where you drag and drop your image and then compare the original with your optimized version side by side.
You can control compression, the number of colors, metadata settings, select image format (JPG, GIF, WebP, or PNG), and more.
We have used this program extensively in the past but have now moved on to optimizing images programmatically with Cloudinary.
You can see a screenshot below:
You can download the tool here.
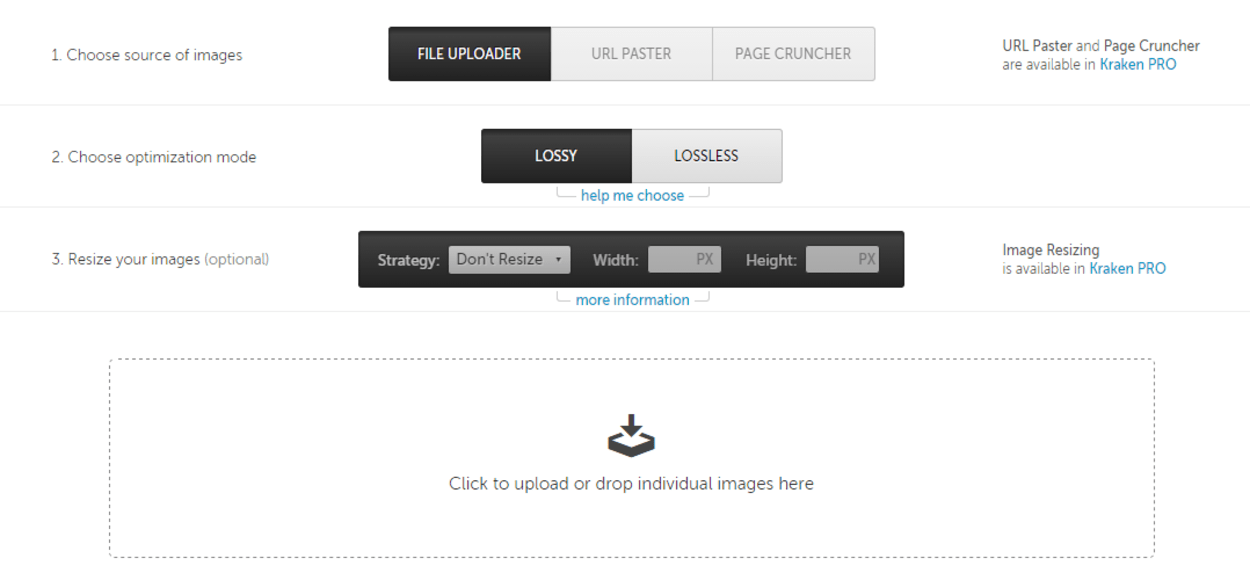
Kraken.io
An almost direct replacement for the old Smushit service is one called Kraken.io, and this is a service we have used in the past ourselves. Kraken.io can be used either via their web interface or one of the many integrations, including WordPress.
The web interface is straightforward to use, although, with the free plan, you can only upload one file at a time, which can be up to 1MB in size. You can choose between lossy (high compression) or lossless. You can see a screenshot of the web interface below:
The WordPress plugin will work with the free plan for a limited time (50MB in total), so to make the most of this, you will want to pay for one of the premium plans. At first glance, it will appear to cost $9 per month for their Basic Plan, but if you look closely at the pricing table, you will see a Micro Plan for just $5 per month. The micro plan has been more than adequate for our needs on this website.
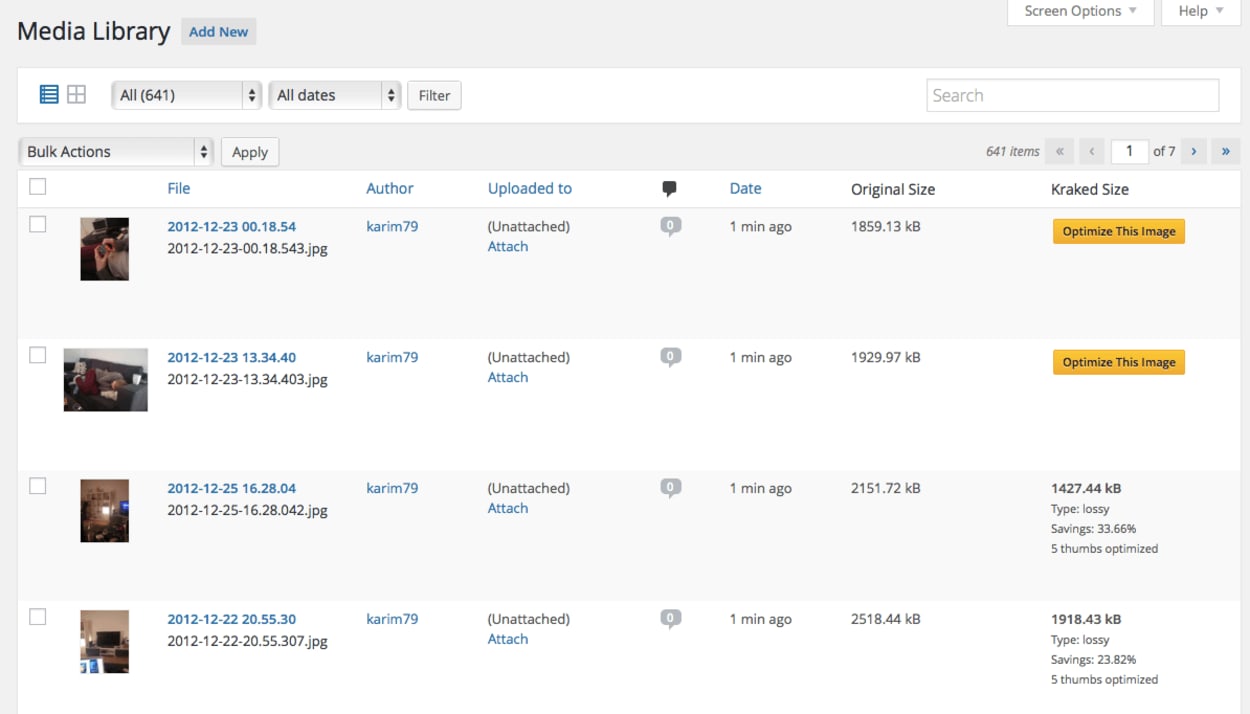
When using the WordPress plugin, it will automatically optimize and convert your image files when you upload them. You can also optimize existing files from within the Media Library.
Other Image formats
We’ll finish by touching briefly on two image formats that you should be aware of. There are three in particular that have superior compression and higher quality characteristics. We’ll take a look at them in turn.
WebP
There are many image formats better than JPEG. The main is WebP.
WebP is an image format that supports lossy (reducing file size that may reduce visual quality) and lossless (reducing file size without any impact on visual quality). It also permits animation and alpha transparency.
Support for WebP images is comprehensive with only Internet Explorer not being compatible. Should this be an issue a fallback strategy can be used.
One of the easiest ways to implement WebP is to use a JPEG as normal and serve it via a content delivery network that offers image optimization. This will then serve a WebP version when it can provide file size savings to compatible browsers.
Companies such as CloudFlare provides this functionality with their Pro plan. Cloudinary also offers this and has a generous free plan.
JPEG 2000 Image Format
The JPEG committee created JPEG 2000 (JP2) in 2000. Their original intention was to supersede the original Image Format they created in 1992, but history shows this never happened. It features a newly designed, wavelet-based method. It offers some advantages in image fidelity over standard JPEG.
Its browser support is limited, with only Safari making any attempts to use it.
JPEG XR Image Format
The latest JPEG image format, again created by the JPEG Group, has better compression. It supports lossless compression, alpha channel, and 48-bit deep color over the normal jpg format.
Internet Explorer and Edge only currently support this image format.
Progressive JPEG Browser Support
Progressive images work well with all modern browsers, including Chrome, Firefox, and Internet Explorer 9. The only browsers with significant issues with the progressive format are Internet Explorer 8 and below. With only 0.4 percent of Internet Explorer Users now using IE8 or below, this is not something you should worry about.
Even where a browser does not support such images, they would still display, but only after the entire image file has loaded.
Desktop
| Chrome | Edge | Firefox | IE | Opera | Safari |
|---|---|---|---|---|---|
| Yes | Yes | Yes | Yes | Yes | Yes |
Mobile
| Android Webview | Chrome Android | Edge | Firefox Mobile | IE Mobile | Opera Mobile | Safari Mobile |
|---|---|---|---|---|---|---|
| Yes | Yes | Yes | Yes | Yes | Yes | Yes |