SiteGround’s File Manager is a powerful tool forming part of their Site Tools control panel. It allows you to manage the files and folders associated with your website easily.
Whether you’re looking to upload new files, delete old ones, or make changes to existing files, SiteGround’s File Manager makes it easy to do so.
In this guide, we’ll walk you through the basics of using SiteGround’s File Manager, including:
- Accessing the File Manager
- Creating and Renaming Files and Folders
- Uploading to and Downloading Files
- Deleting Files and Folders
- Archiving Files and Folders
- Finding your website files and folders
- Editing Website Files
- Editing Hidden and System Files
- Locating the .htaccess File
- Checking File and Folder Sizes and Inode Usage
- Managing File Permissions
- Removing Files and Folders from Your Website
This guide assumes that you have already signed up for SiteGround. If you haven’t done so, you can get up to 80% off here. We recommend at least the GrowBig plan, which includes on-demand backups, 30% faster PHP, and site staging.
How to Access SiteGround’s File Manager
To access SiteGround’s File Manager, you’ll need to log into your SiteGround account and access SiteGround’s tools for your chosen website.
You can find details on how to do this in the following articles:
Following these steps, you’ll end up on SiteGround’s Site Tools dashboard.
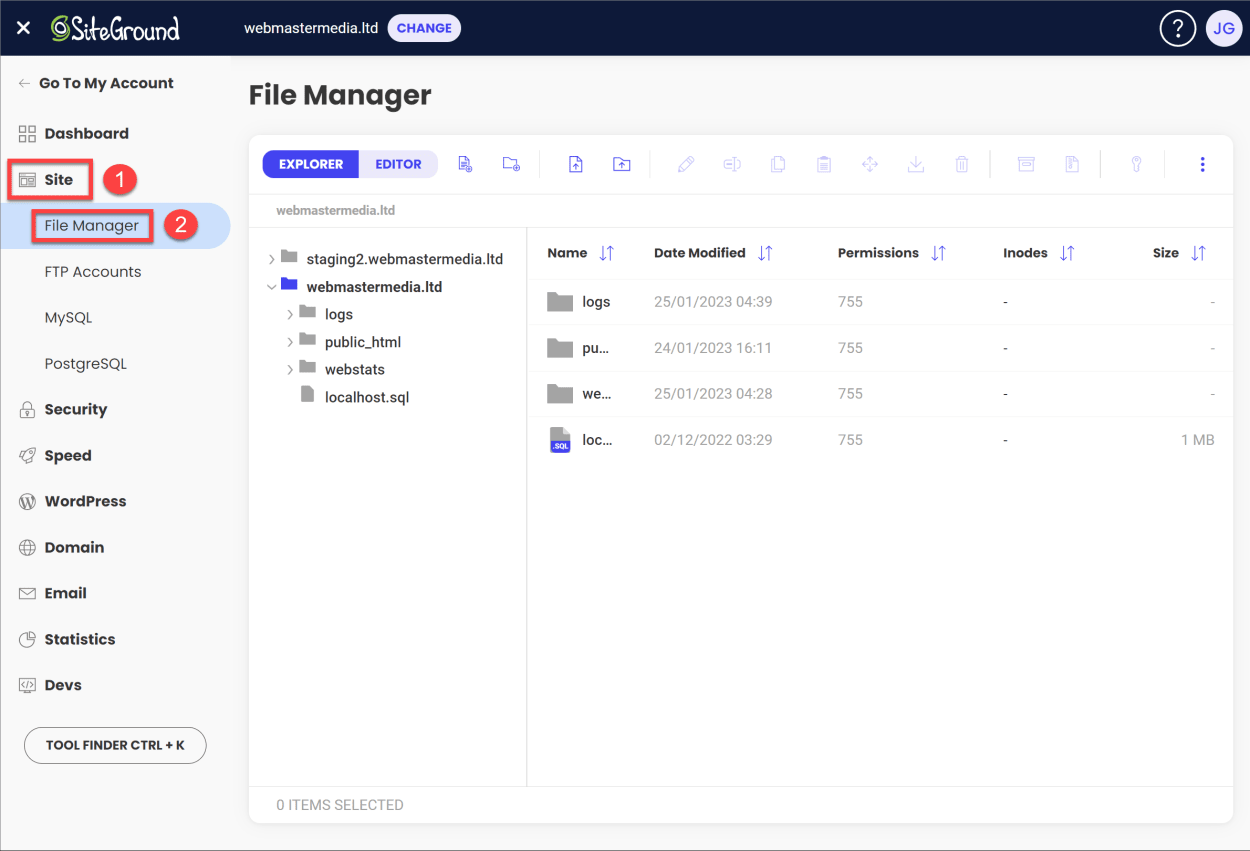
From here, you can access SiteGround’s File Manager by clicking on the “Site” menu item in the left-hand menu, then “File Manager”.
See the screenshot below:
How to create files or folders
Creating new files and folders through SiteGround’s File Manager is easy.
Let’s look at each in turn:
Creating a new file
You have a couple of options to create a new file in SiteGround’s File manager.
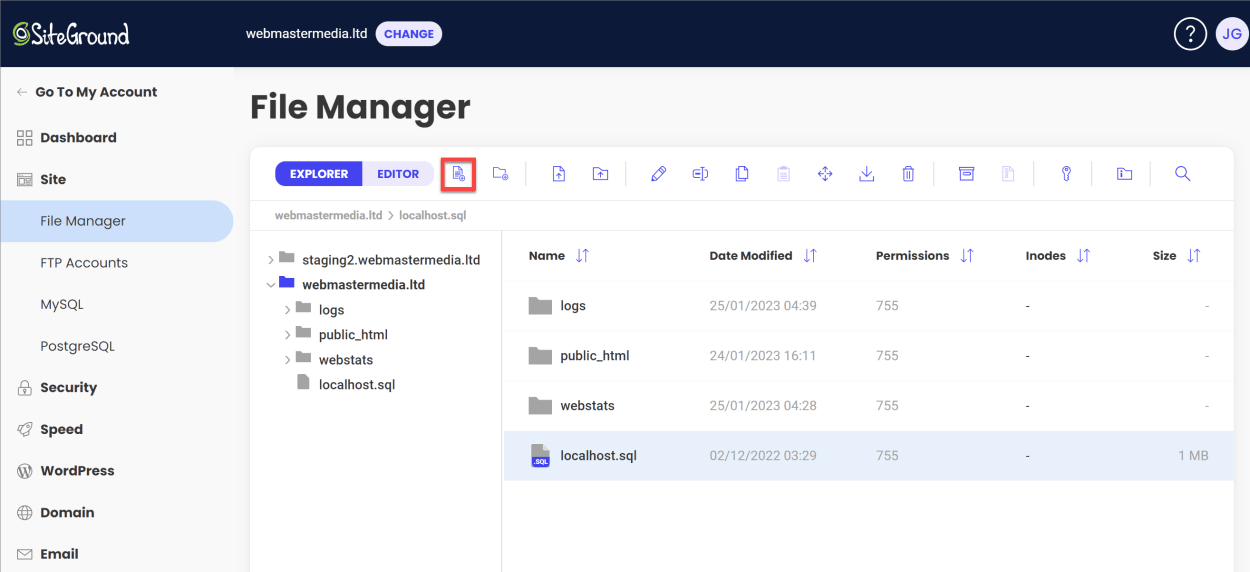
In the toolbar at the top of the File Manager window, you will see an Explorer button (that is selected by default) and an Editor button. You can access the same file creation functionality using either of these, namely:
- Clicking on the New File icon in the toolbar
- Clicking on the Editor button in the toolbar, click the “Create New File” link.
For both options, you must first navigate to the folder where you want to create the new file, using the File Manager’s folder navigation system.
This first screenshot highlights the New File icon in the toolbar:
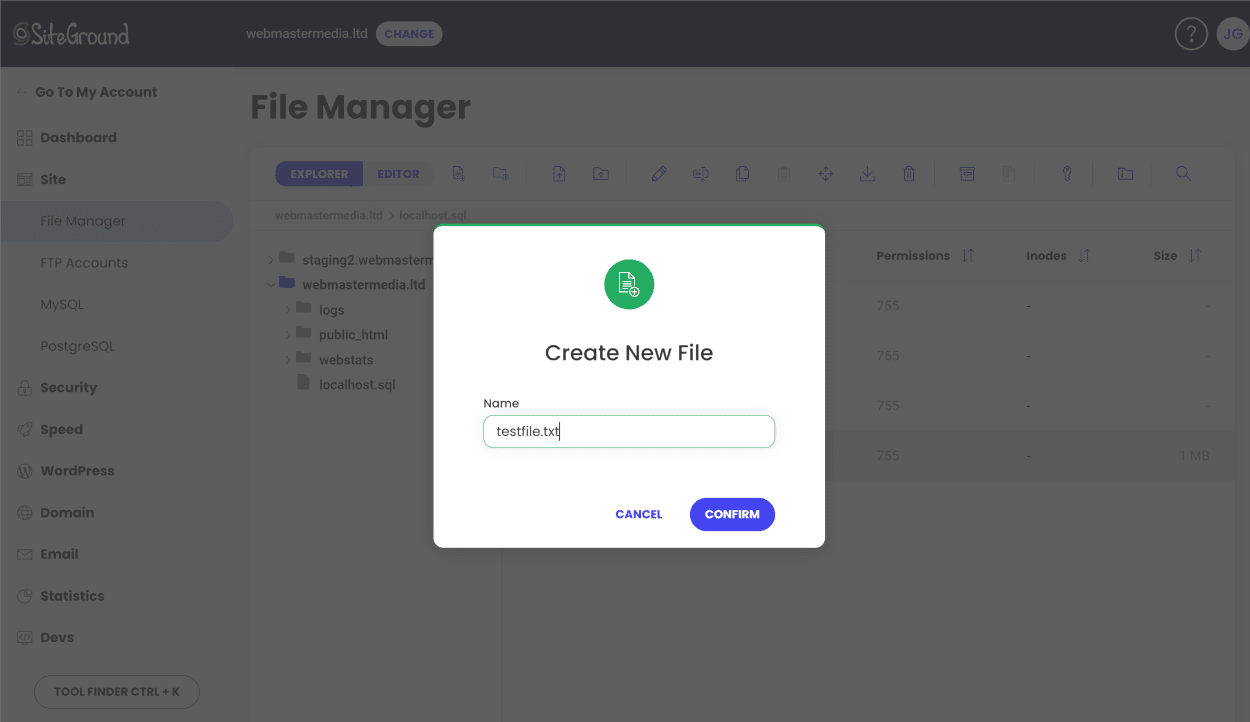
The second screenshot shows the new file creation modal. As you can see, it is as simple as entering the file’s name and then clicking the “Confirm” button.
And that’s it! You’ve created a new file.
Creating a new folder
Creating a folder in SiteGround’s File Manager is just as easy as creating a file.
First, navigate to the folder where you want to create the new folder using the File Manager’s folder navigation system.
Then, click on the “New Folder” icon in the toolbar, as shown in the screenshot below:

This will bring up the new folder creation modal.
Enter the name of the folder you wish to create and click the “Confirm” button.
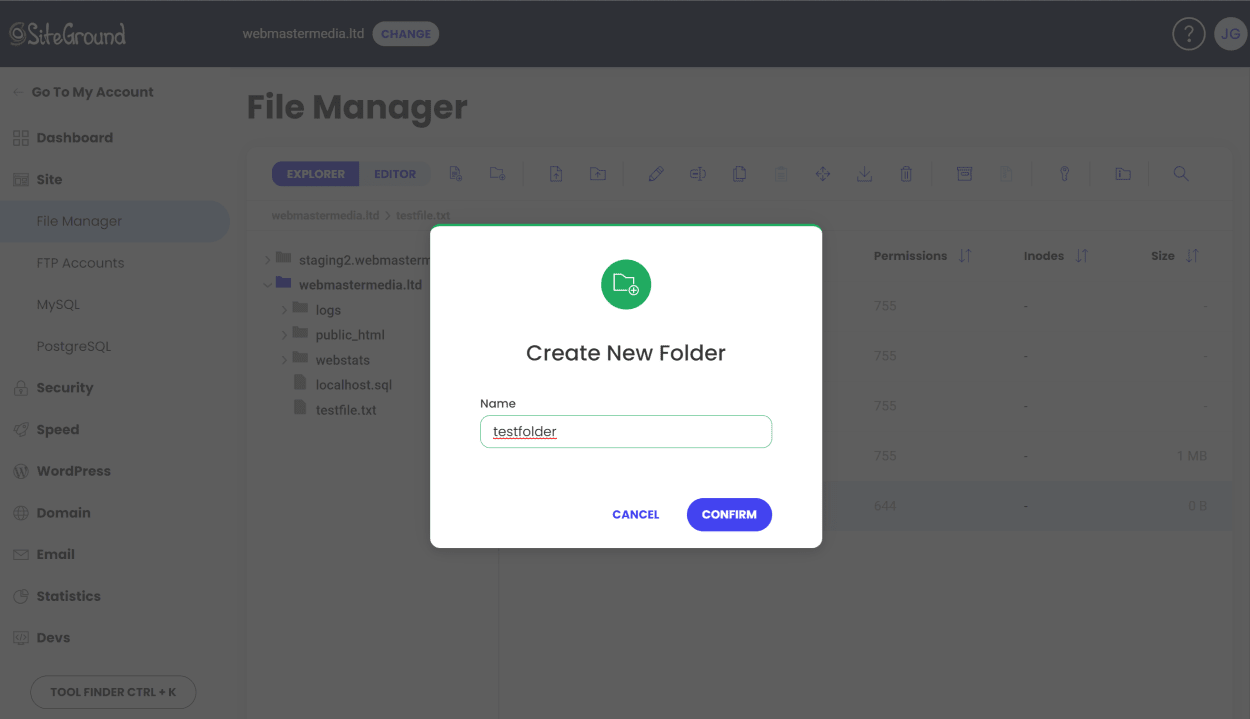
You have now created a new folder.
How to upload or download files or folders
Uploading and downloading files and folders is easy with SiteGround’s File Manager.
Let’s look at each in turn.
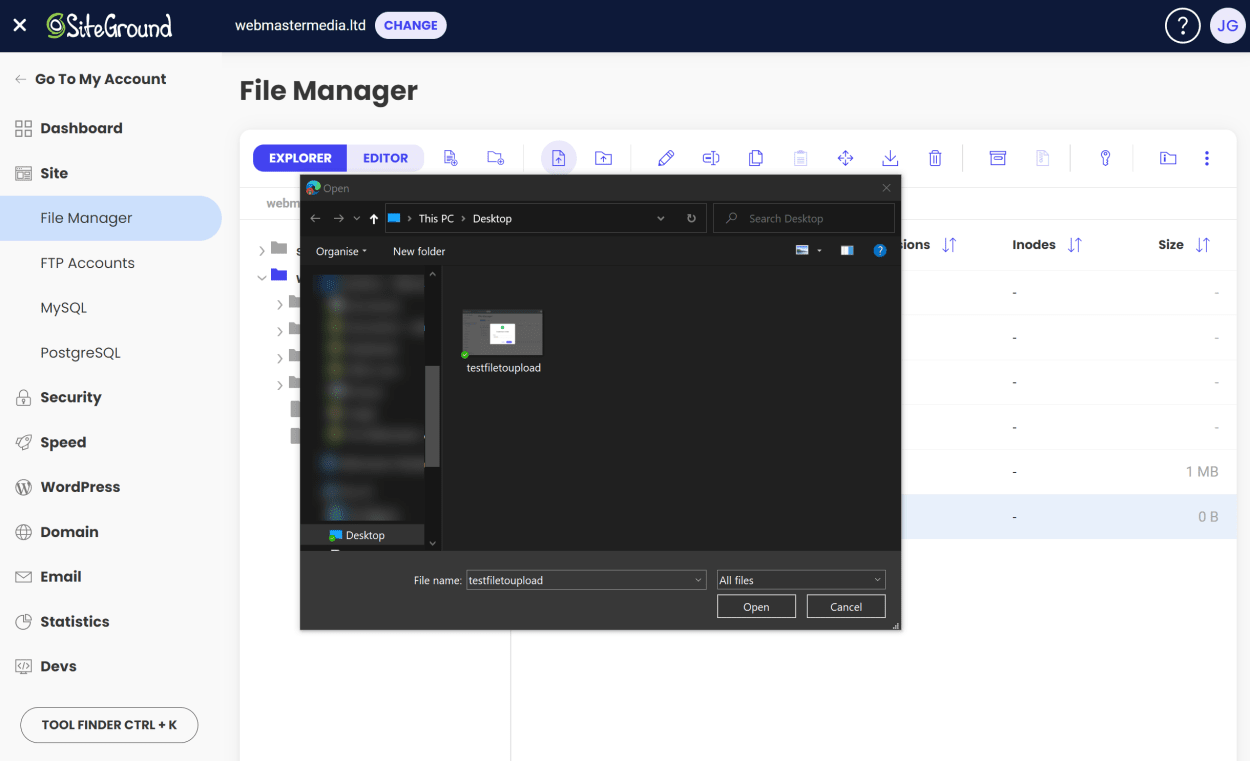
Uploading files or folders
To upload a file or folder in SiteGround’s File Manager, you’ll need to click on either the “File Upload” or “Folder Upload” icon at the top of the File Manager window.

This will open a new window where you can select the file or folder you want to upload. Once you’ve chosen the file or folder, click the “Open” button.
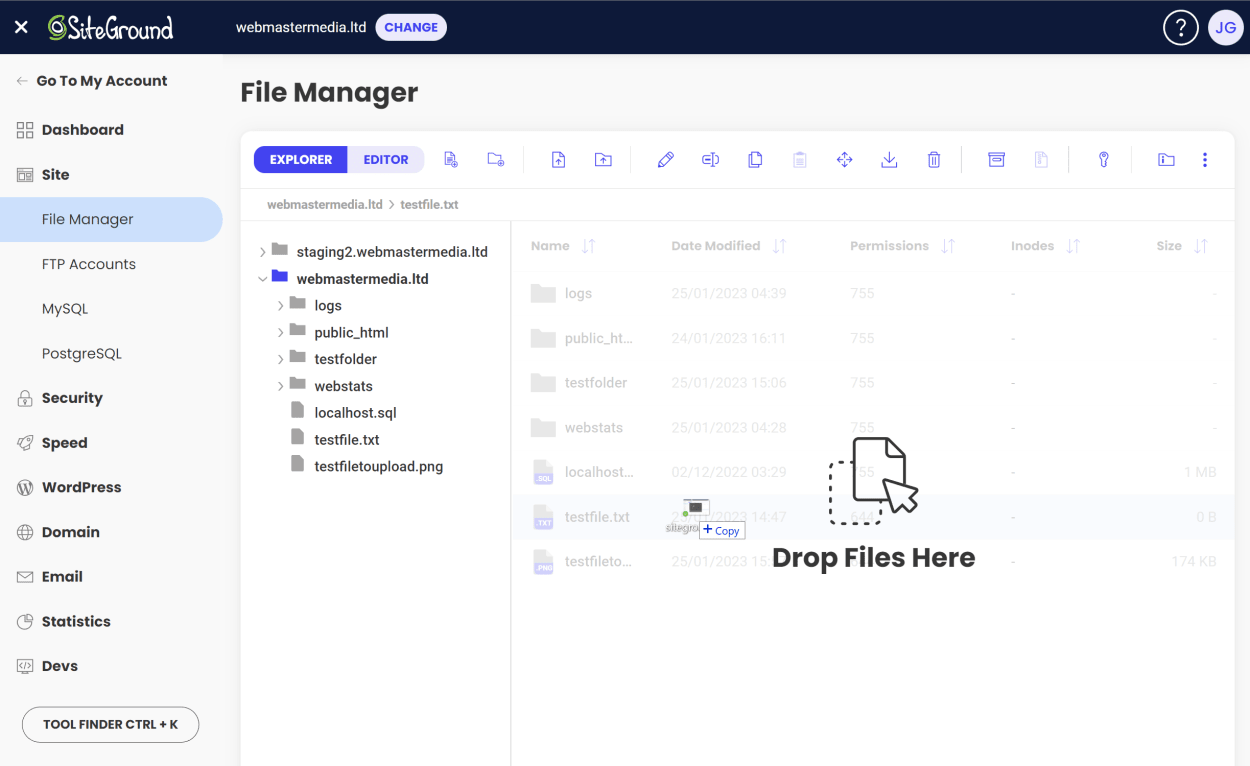
You can also drag and drop files or folders into the File Manager window to upload them.
An alternative solution is to use a program like FileZilla to upload files to your SiteGround hosting account. We’ve written a guide on how to upload your website to SiteGround using FileZilla here.
Downloading files or folders
To download a file or folder in SiteGround’s File Manager, you’ll need to select the file or folder you wish to download. Then, click on the “Download” icon at the top of the File Manager window.
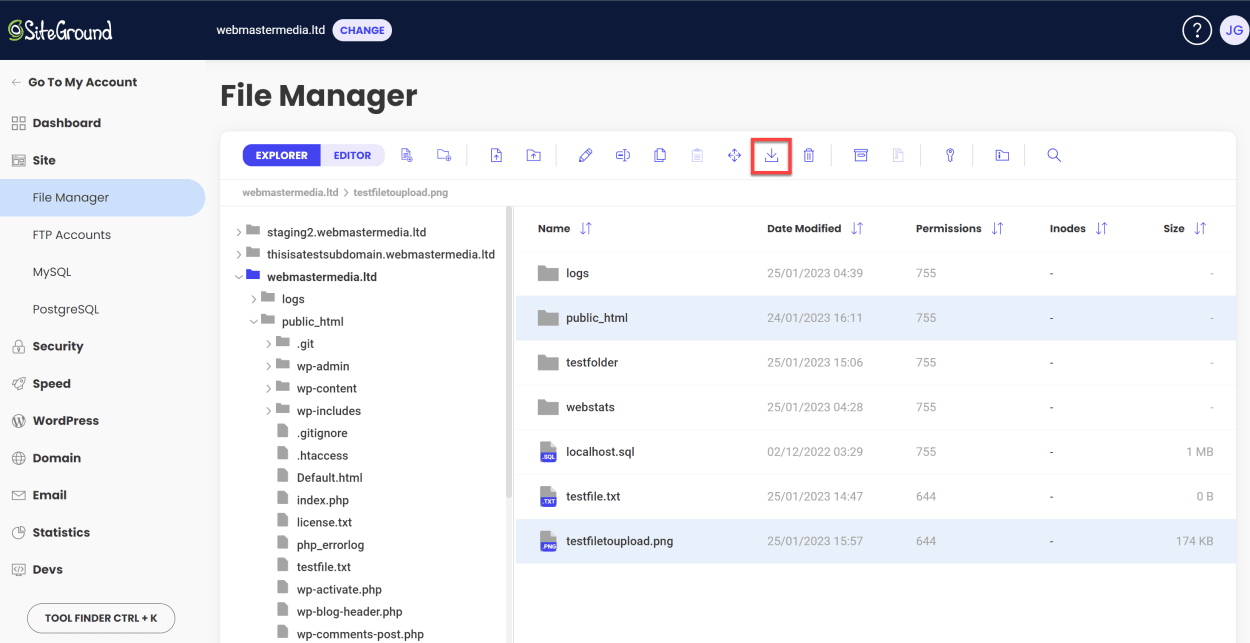
The file will then be downloaded to your computer’s default download location.
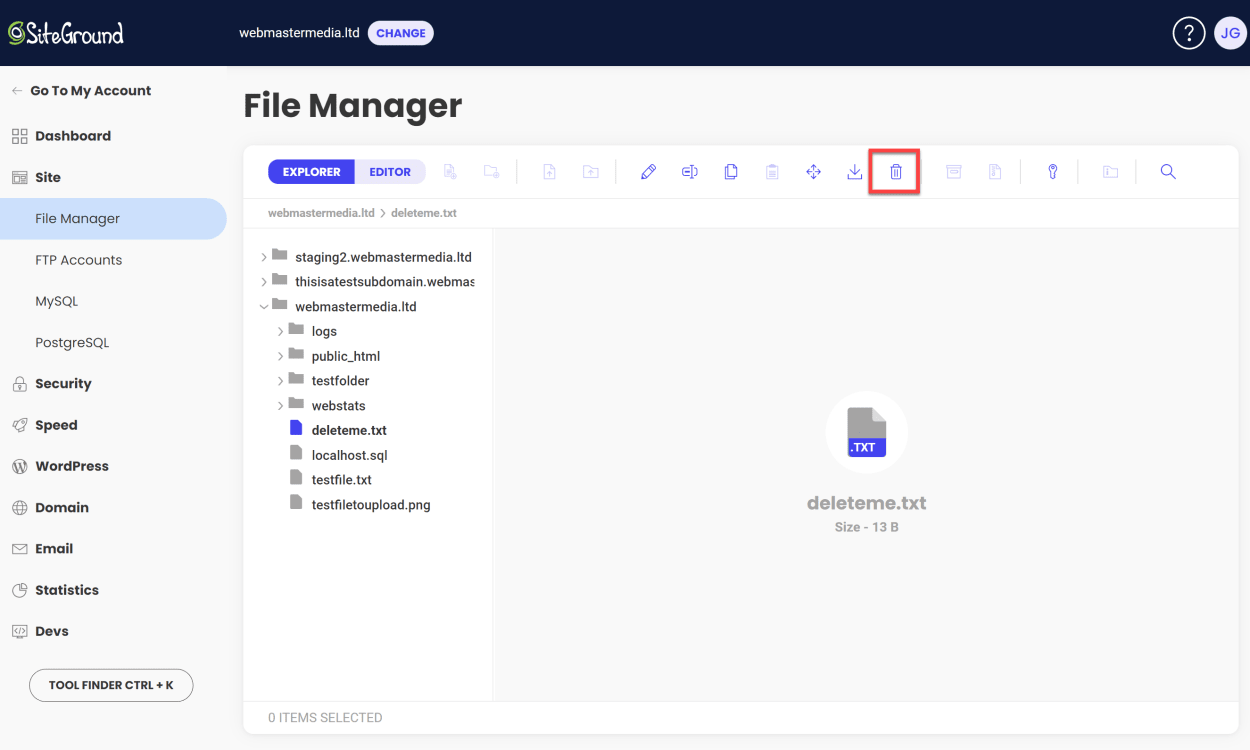
How to delete files or folders
To delete a file or folder in SiteGround’s File Manager, you’ll need to select the file or folder you wish to delete.
Then, click on the “Delete” icon at the top of the File Manager window.
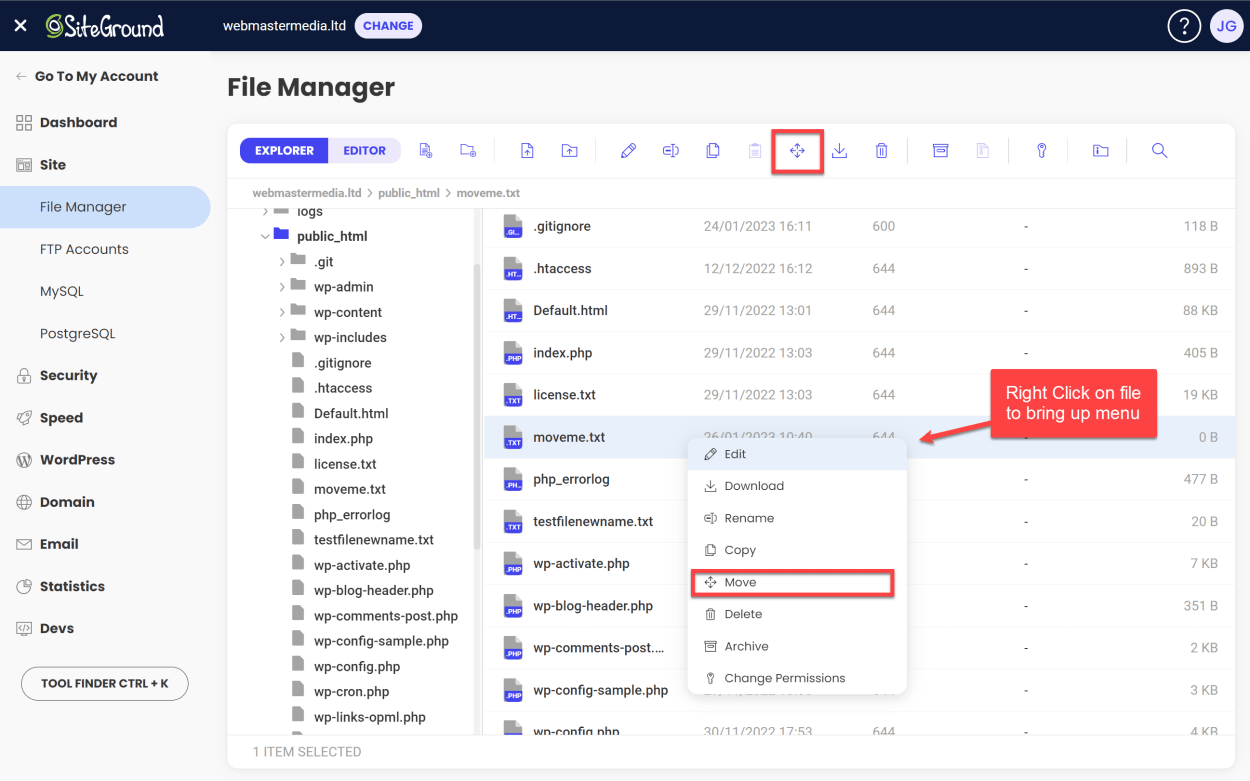
How to move files or folders
To move a file or folder in SiteGround’s File Manager, you’ll need to select the file or folder you wish to move. Then, click on the “Move” icon at the top of the File Manager window (or right-click on the file and select “Move”).
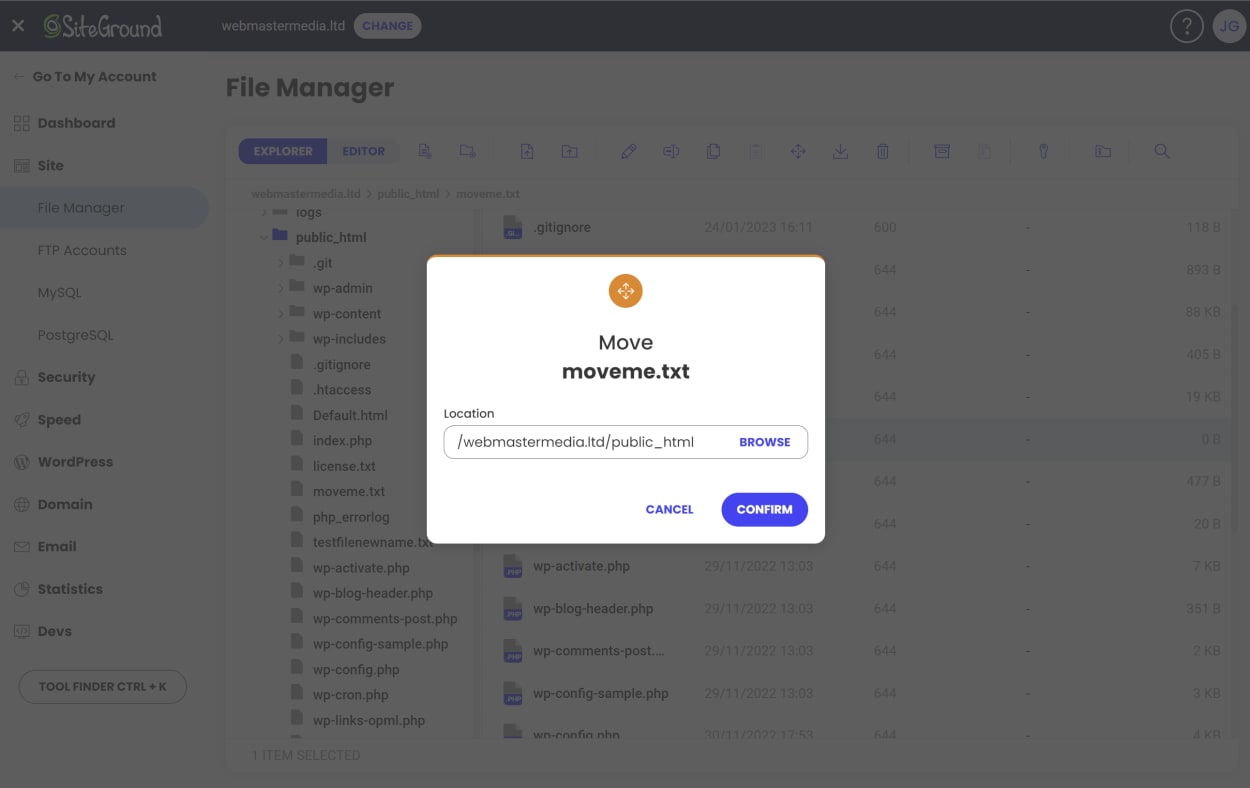
A modal will then appear. Click the “Browse” button to bring up another modal where you can easily navigate through the file system and select the folder you want to move the file or folder to.
Once you’ve selected the folder, click the “Confirm” button.
Alternatively, you can drag and drop files or folders into the File Manager window to move them, as shown in the gif below:
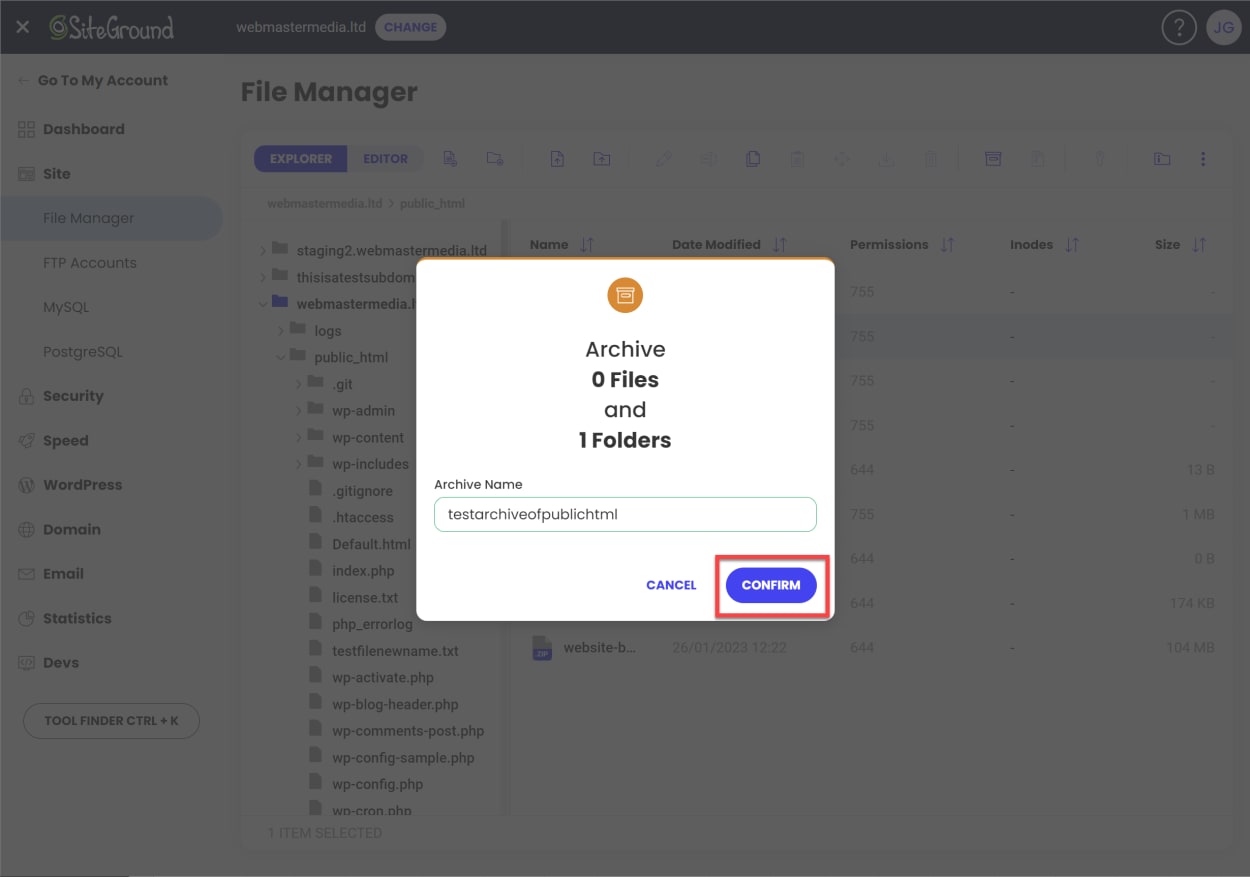
How to archive files or folders
To archive a file or folder in SiteGround’s File Manager, you’ll need to select the file or folder you wish to archive.
Then, click on the “Archive” icon at the top of the File Manager window (or right-click on the file and select “Archive”).

A modal will then appear. Type in a name for the archive file and click the “Confirm” button.
We’ve written a detailed tutorial on how to download a .zip archive file of your public_html folder in SiteGround’s File Manager here.
How to find your website files and folders
So far, we have looked at how to create, upload, download, and delete files and folders in SiteGround’s File Manager.
However, we haven’t yet looked at how to find the files and folders you want to work with. In particular, we still need to look at how to find your website’s files and folders.
SiteGround makes this easy. When you log into the File Manager, you will see a list of all the files and folders in your account. You will be in the root folder of your account.
The naming conventions for your site’s root folders are as follows:
- Main Domain - This is the location of your main domain’s files. For example, if your main domain is example.com, then the files for your main domain are located in the folder “example.com”.
- Subdomains - This is the location of your subdomain’s files. For example, if your subdomain is blog.example.com, then the files for your subdomain are located in the folder called “blog”.
- Staging Sites - This is the location of your staging site’s files. For example, if your staging site is staging.example.com, then the files for your staging site are located in the folder called “staging.example.com”.
You can see an example of this in the screenshot below:
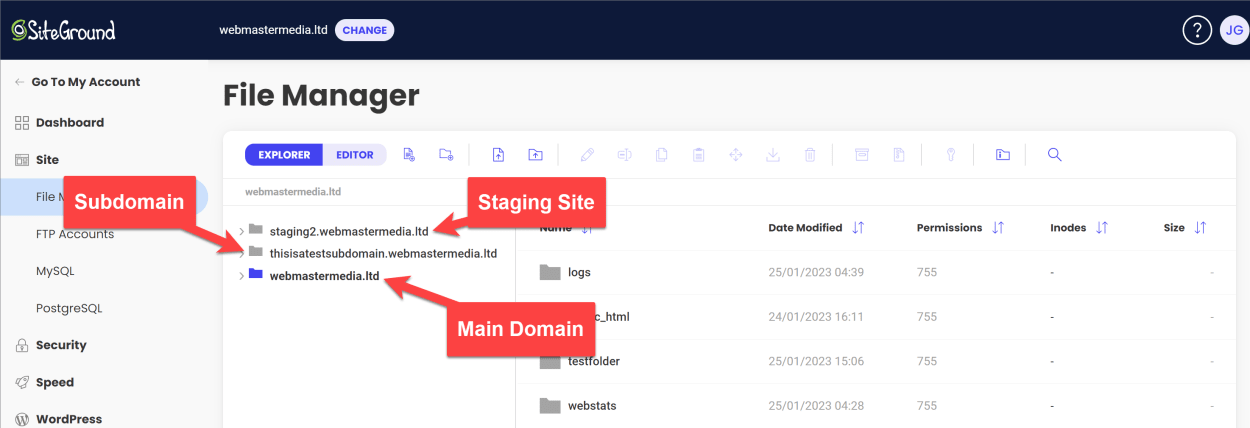
You will find a folder called “public_html” within each site’s root folder. This is the folder where you will find your website’s files and folders.
This is where you can upload website files, such as HTML, CSS, JavaScript, PHP, and image files. They will be publicly accessible on the web.

You can also upload files to the root folder of your site. However, these files will not be publicly accessible on the web. They will only be accessible to you through the File Manager.
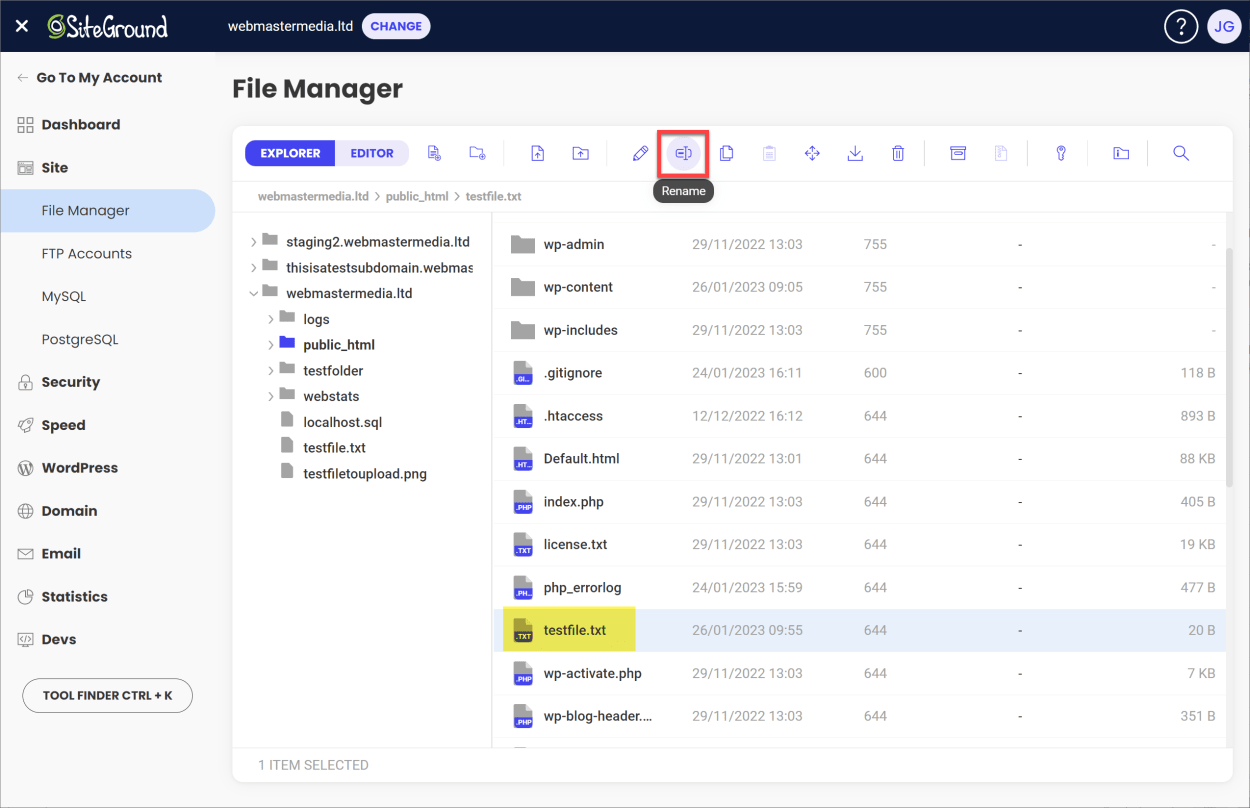
How to rename files or folders
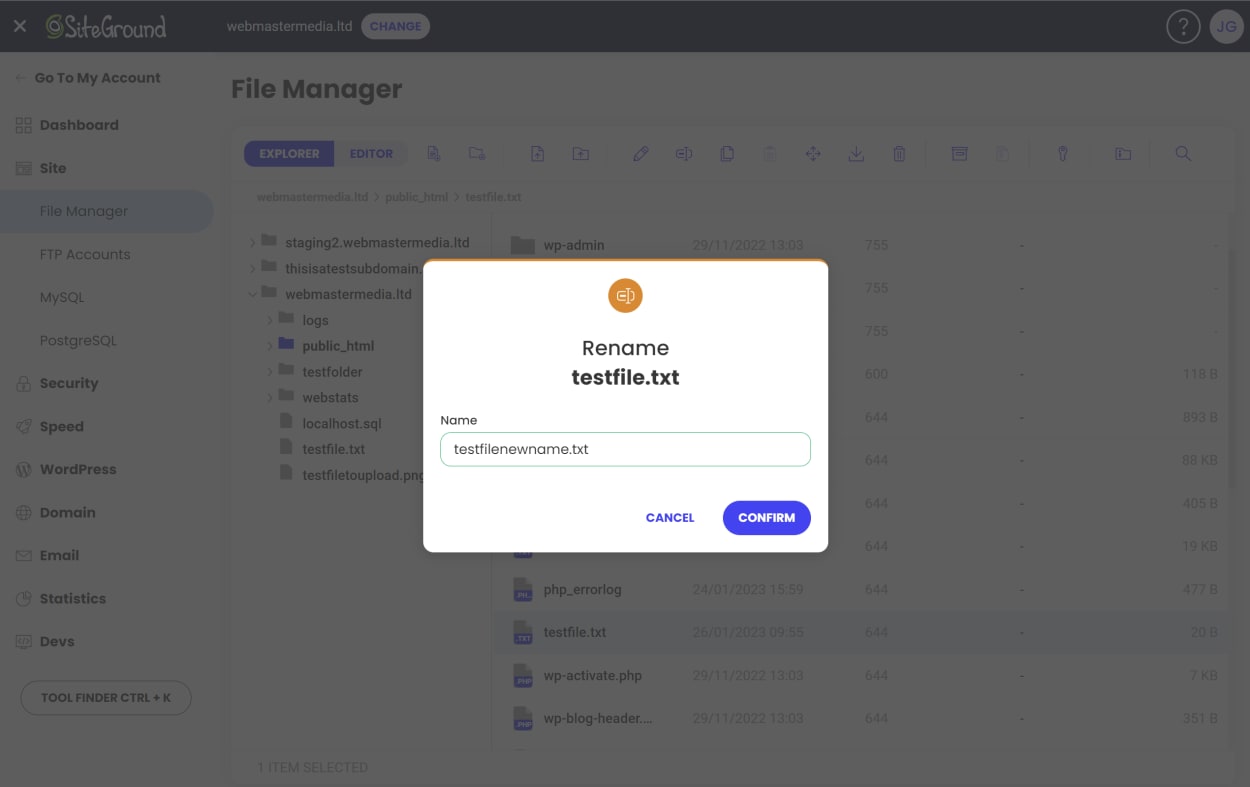
To rename a file or folder in SiteGround’s File Manager, you’ll first need to select the file or folder you wish to rename. Then, click on the “Rename” icon at the top of the File Manager window.
A pop-up window will appear, where you can enter the new name for the file or folder. Click on the “Confirm” button to confirm the change.
How to edit files
To edit a file, you’ll need to click on the “Edit” icon in the top right-hand corner of the File Manager window.
This will open a new window where you can select the file you want to edit.
How to edit hidden or system files
In SiteGround’s File Manager, all hidden and system files are visible by default. This means that you can edit them without having to change any settings.
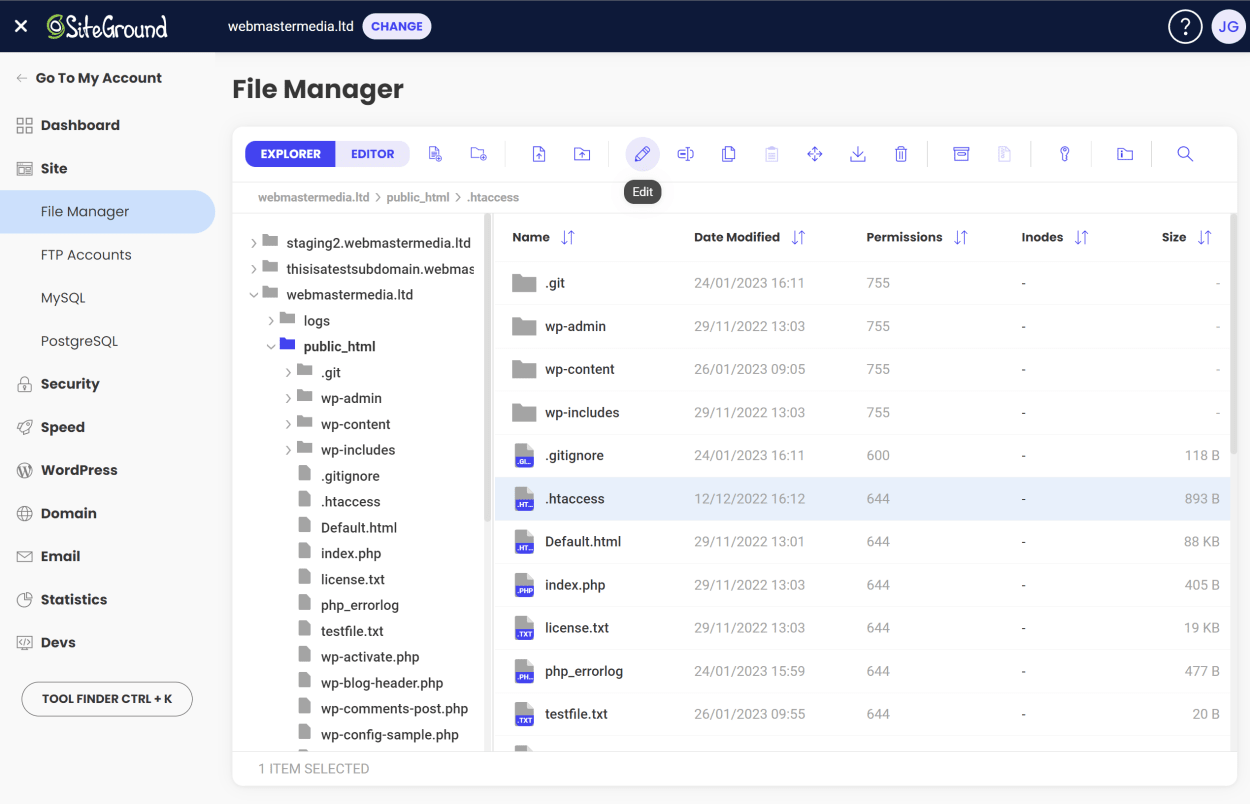
To edit a hidden/system file, firstly select the file you want to edit. Then, click on the “Edit” icon at the top of the File Manager window, as shown in the screenshot below:

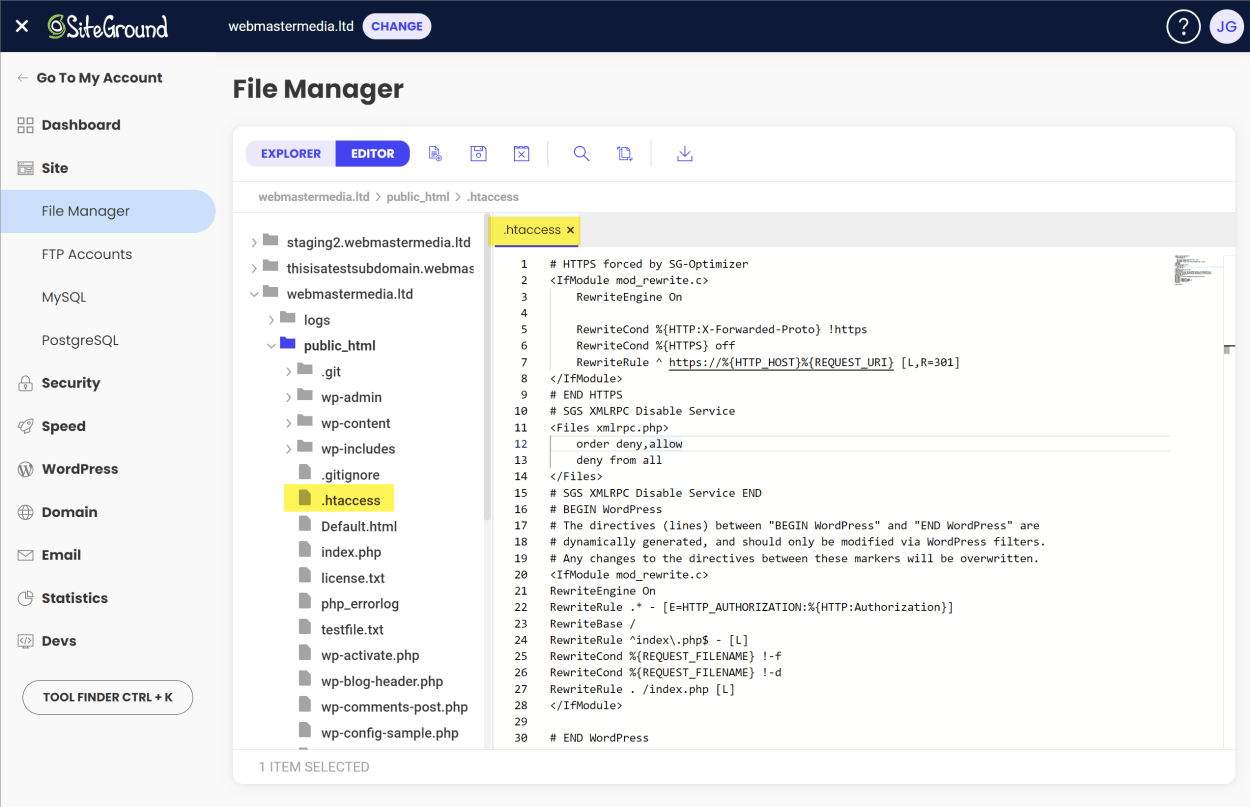
This will bring up the editor window. You can then edit the file as you would any other file.
An example of editing a hidden file, .htaccess, is shown in the screenshot below:
We have already looked at how to edit files in the previous section, including the search and replace function.
How to find the .htaccess file
We’ve just looked at how to find and edit hidden files in the previous section. However, there is one hidden file in particular that is frequently altered by website owners: the .htaccess file.
The .htaccess file is a configuration file used by the Apache web server. It allows for creating per-directory configurations that override the main server’s settings. It can be used to change settings such as URL rewriting, security, and access control.
It is placed in a directory on the server, and the configuration it contains applies to that directory and all subdirectories. It’s important to note that the file name starts with a dot(.) which makes it a hidden file in Linux and Unix-based systems.
We have already established that hidden files, such as the .htaccess file, are visible by default in SiteGround’s File Manager.
The most common location of the .htaccess file is in the root of the public folder of your website. In other words, it is located in the public_html folder of your website.
You can see an example of this in the screenshot below:
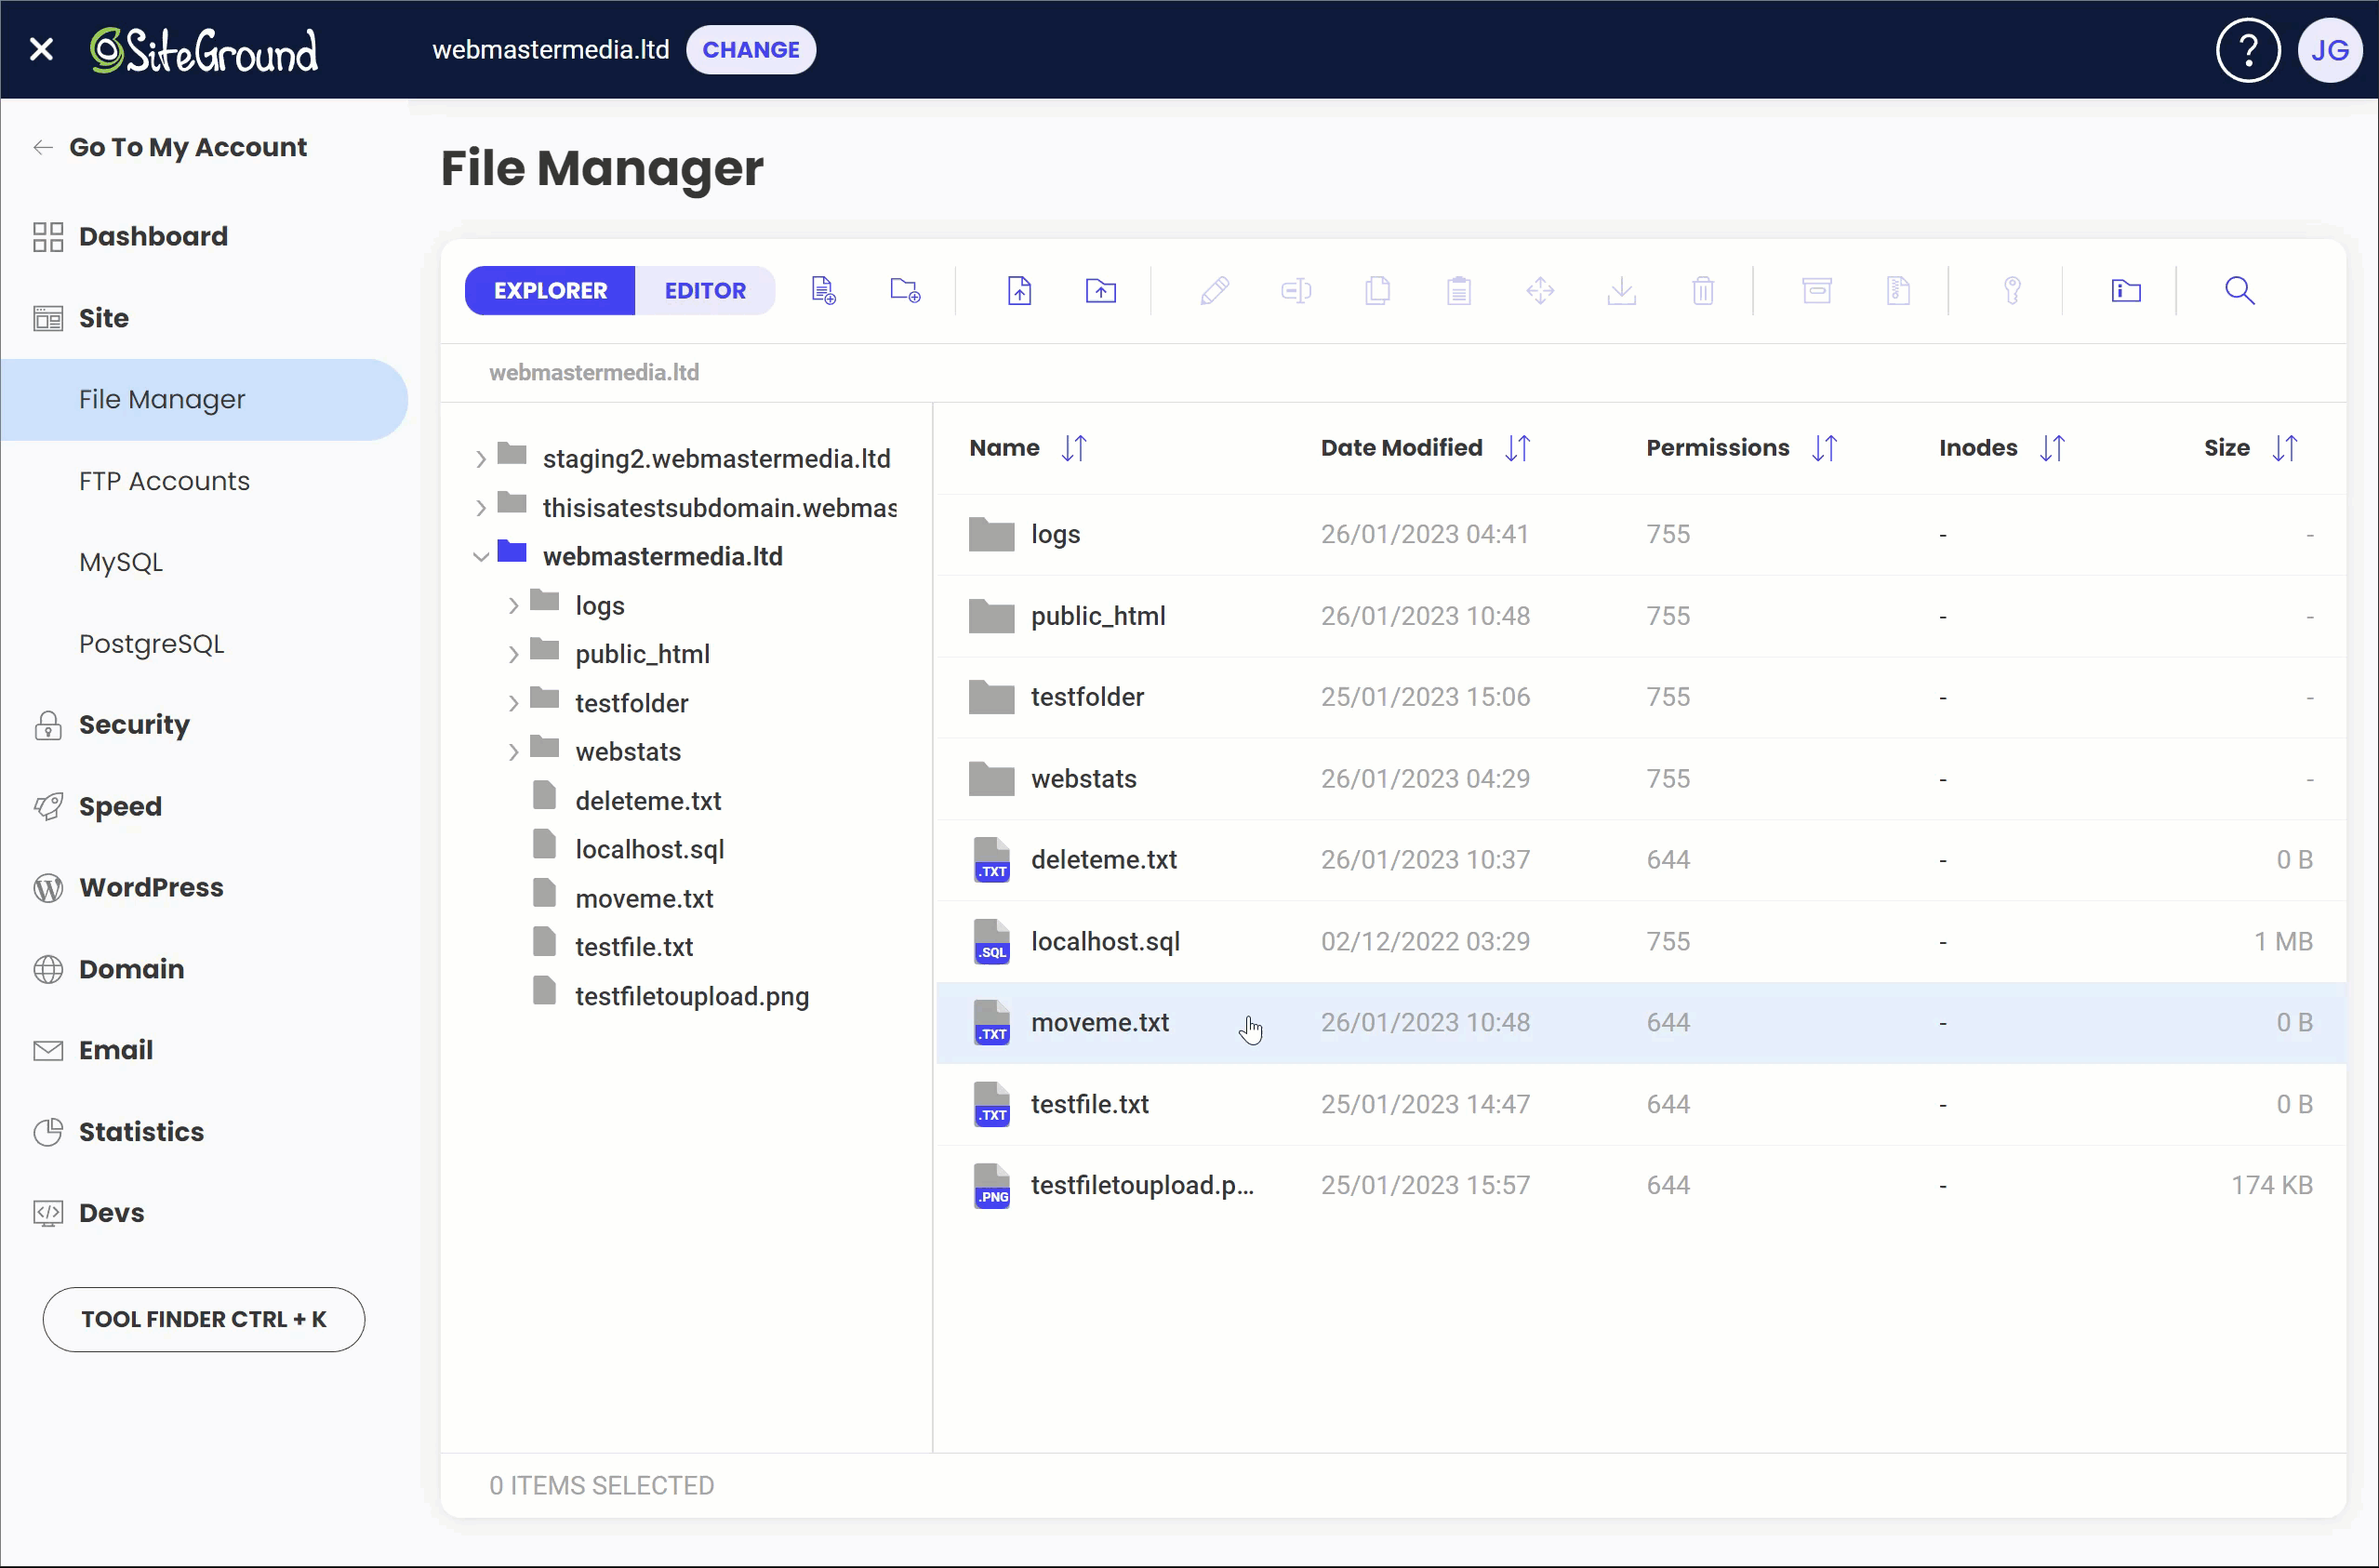
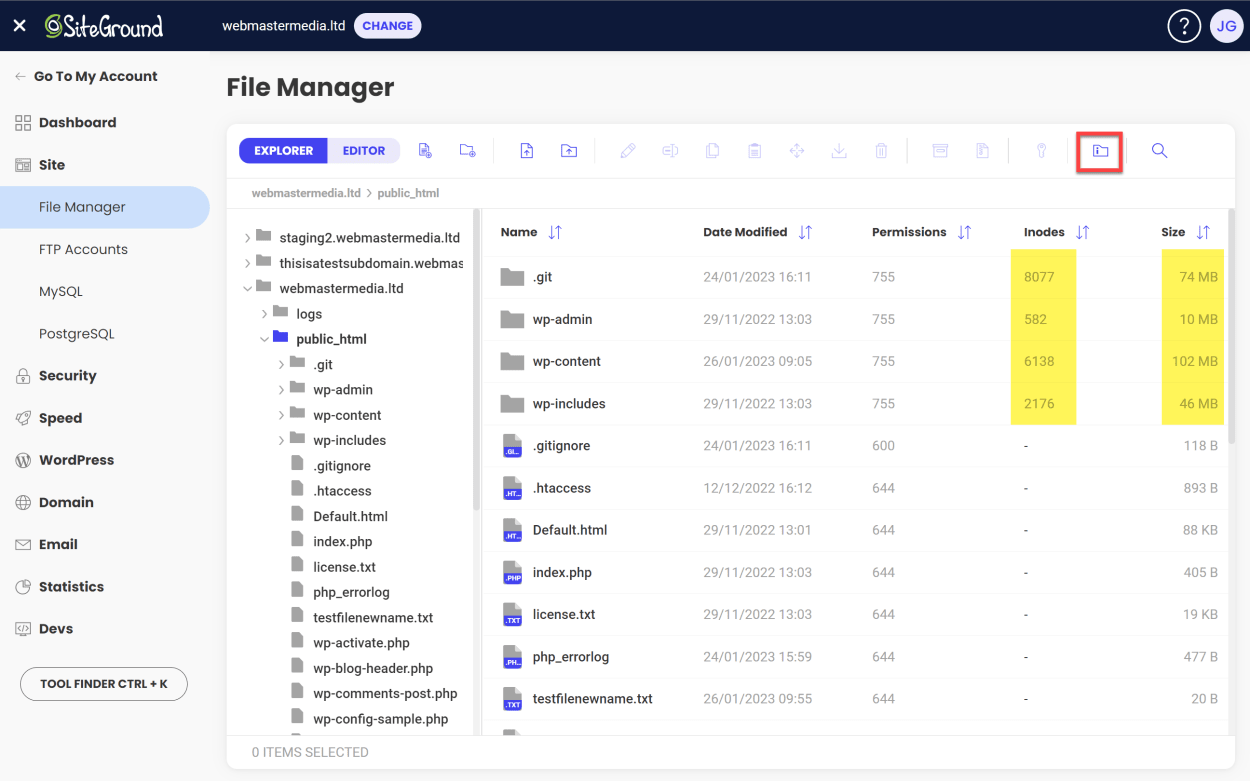
How to view the file and folder size, and the number of inodes used
By default, SiteGround’s File Manager will show you the following information for each file or folder:
- File name
- File type (icon)
- Date modified
- Permissions
- File size
However, if you want to view the file, folder size, and the number of inodes used, you’ll need to click on the “Show Folder Size and Inodes” icon in the top right-hand corner of the File Manager window.
The information will then be displayed in the “Size” and “Inodes” columns.
How to change the file and folder permissions
To change the file/folder permissions in SiteGround’s File Manager, you’ll need to click on the “Change Permissions” icon in the top right-hand corner of the File Manager window (or right-click on the file or folder).
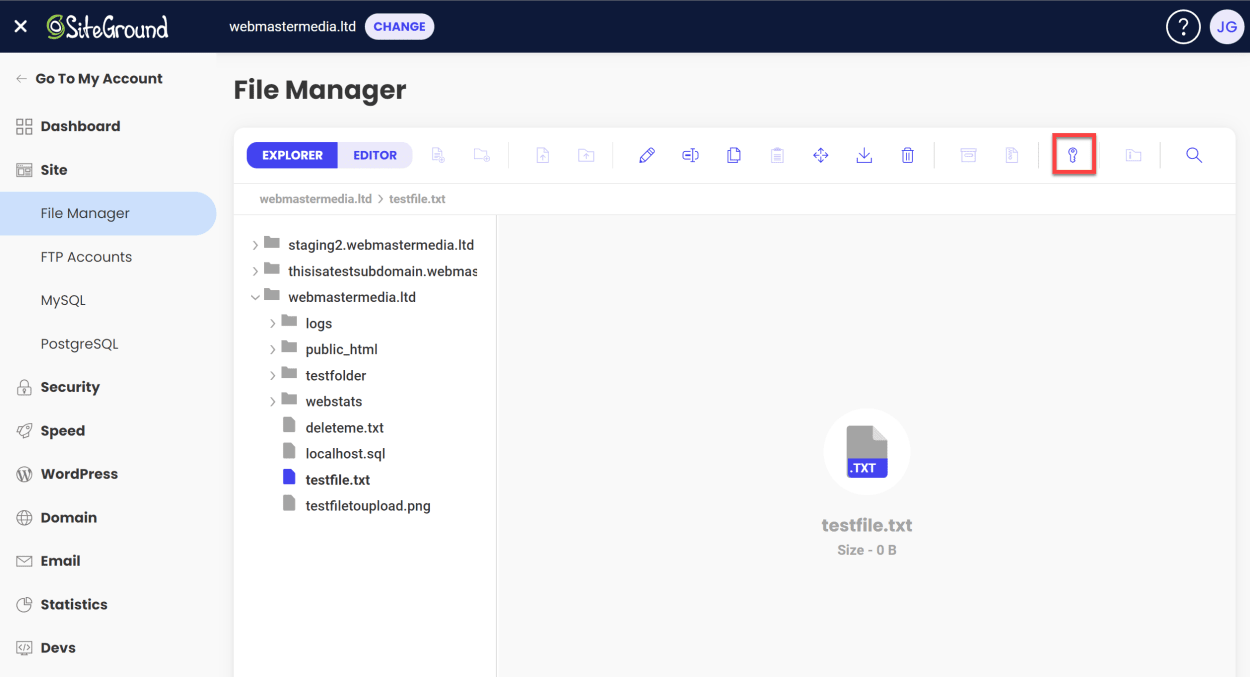
This will bring up a pop-up window where you can change the file/folder permissions.
When changing file permissions, you will need to choose from the following:
- Read: Allows a user to open and read a file but not make any changes to it.
- Write: Allows a user to open and make changes to a file but not execute it as a program.
- Execute: Allows a user to execute a file as a program but not make any changes to it.
As you select different permissions, you will see that the number in the “Permissions Value” box changes. This is the numeric value of the permissions you have selected.
Once you are happy with your selected permissions, click on the “Confirm” button to save the changes.

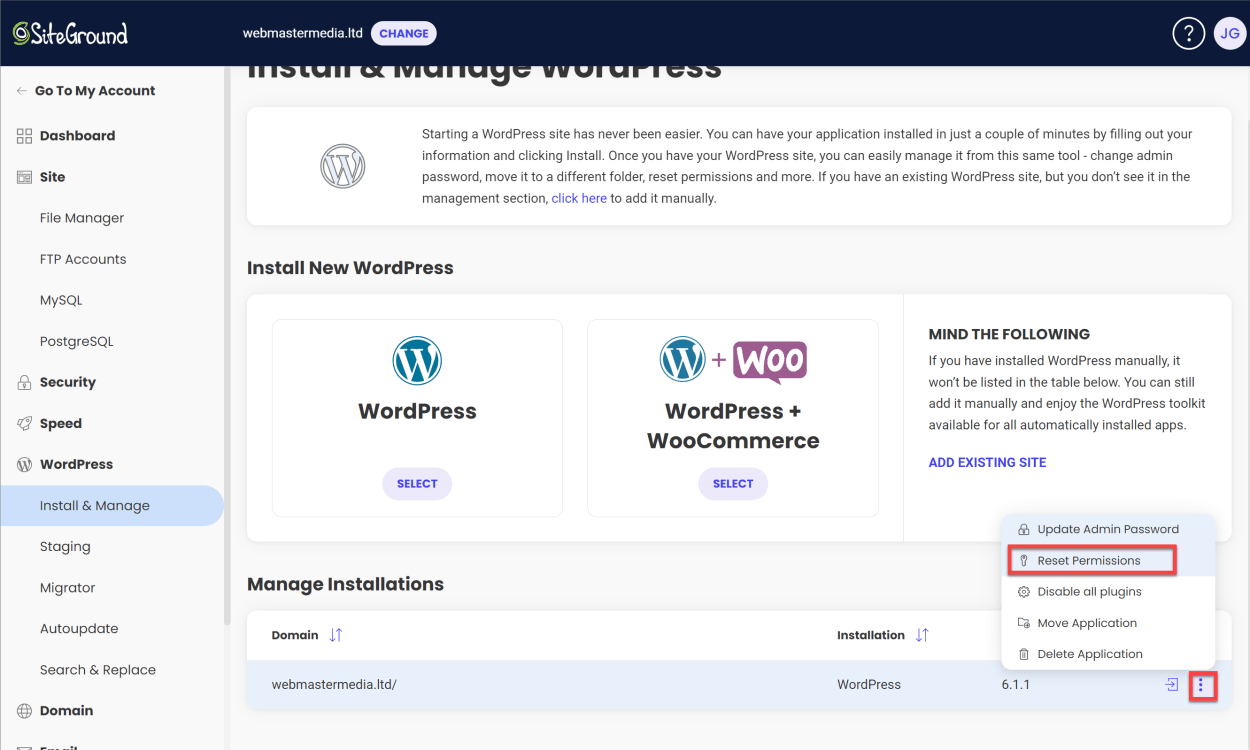
If you are having trouble with permissions for your WordPress website, SiteGround has a separate tool that enables you to reset your WordPress Permissions. To use this, in the Site Tools dashboard, go to WordPress Tools > Install & Manage, and then in the actions box next to your WordPress installation, select “Reset Permissions”.
This will set all file permissions to “644” and all folder permissions to “755”.
See the screenshot below for an example: